Now that we understand that Git is our local version tracking tool and GitHub is where the ArrayList capstone project repository is hosted online, we face the next practical problem: How do we get a copy of that online project onto our own computer so we can work on it?
The process of downloading a complete copy of a Git repository from a remote host (like GitHub) to your local machine is called cloning. When you clone a repository:
You download not just the latest versions of the project files, but the entire history of changes (all the snapshots/commits) stored in the repository’s .git folder.
Git also sets up a connection back to the original online repository (often referred to as the origin), which is important for more advanced workflows like fetching updates or contributing changes (though we won’t focus on those here).
Essentially, cloning gives you your own independent, fully functional Git repository on your local machine, based on the state of the remote repository at the time you cloned it.
Subsection12.8.2Cloning the ArrayList Project using VSCode
Subsubsection12.8.2.1Prerequisite: Installing Git
Before you can clone, you need the actual Git software installed on your computer. Visual Studio Code uses your computer’s Git installation to perform Git operations.
Check if Git is Installed: VSCode might tell you if Git is missing when you try to use a Git feature (often in the Source Control view). You can also check by opening your system’s terminal or command prompt and typing git --version. If it shows a version number, you’re likely set. If you get an error ("command not found" or similar), you need to install it.
Install Git: Download the installer appropriate for your operating system (Windows, macOS, Linux) and run it. Follow the prompts in the installer – for most basic uses in this course, accepting the default settings is usually fine.
Via Source Control View: Open the Source Control view from the Activity Bar (the icon with branching lines). If no repository is open, you should see a button labeled Clone Repository. Click it. (If a different project is open, you might need to use the Command Palette method).
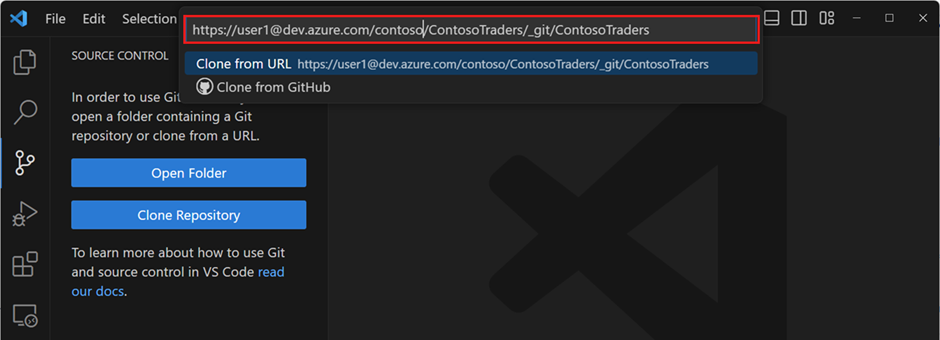
Provide Repository URL: A prompt will appear at the top asking for the repository URL. Paste the following exact URL for our project repository and press Enter:
Choose Local Directory: Your computer’s file explorer will open, asking you where you want to save the cloned project folder. Navigate to the parent directory where you keep your course projects (e.g., your Documents, Desktop, or a dedicated course folder) and select that location (the button might say "Select Repository Location" or similar).
Cloning and Opening: VSCode will download the repository from GitHub (you might see progress indicators). Once finished, it will likely show a notification in the bottom-right corner asking if you want to open the cloned repository. Click Open.
You should now have the 1213-arraylist-example project folder open in VSCode. Congratulations, you’ve cloned your first repository! This folder is your local copy, complete with its Git history.
VSCode’s integration with Git is quite powerful. For more details beyond what we cover here, you can refer to the official documentation you reviewed: Introduction to Git in VS Code
As mentioned, Git is fundamentally a command-line tool. If you open your system’s terminal or Git Bash, navigate (cd) to where you want the project, you can run:
You have successfully obtained a local copy (a clone) of the project repository. However, by default, cloning usually checks out the repository’s main line of development, often called the main branch. For our project, the main branch contains the *completed* solution. To start the exercises, you need to switch to a specific branch containing the starter code. The next section explains what branches are and how to switch to the correct one.