In the previous section (Design Recipe Step 3), we carefully crafted examples to define the precise behavior expected from our ArrayList<T> methods under various conditions. Manually checking every single one of these examples each time we make a change to our code would be incredibly time-consuming and prone to error. How can we efficiently and reliably verify that our implementation meets these behavioral requirements?
This is where the provided unit tests come in. As discussed briefly in Section 5, the file test/DataStructures/ArrayListTest.java contains automated checks, written using the JUnit framework, that correspond directly to the examples and edge cases we identified (and likely many more). Running these tests gives us immediate feedback on whether our ArrayList.java code is working correctly according to the specification (ListADT).
Your task now is not to write these tests, but to learn how to run them and interpret their results within your development environment (VSCode). This feedback loop – implementing a piece of functionality and then running tests to verify it – is fundamental to modern software development and will be crucial as you build your ArrayList.
Visual Studio Code, with the appropriate Java extensions installed (which should be configured in the lab environment), provides a convenient way to manage and run JUnit tests through its "Testing" view.
Open the Testing View: Look for the icon that resembles a beaker or flask in the Activity Bar on the far left side of the VSCode window. Click it to open the Test Explorer pane.
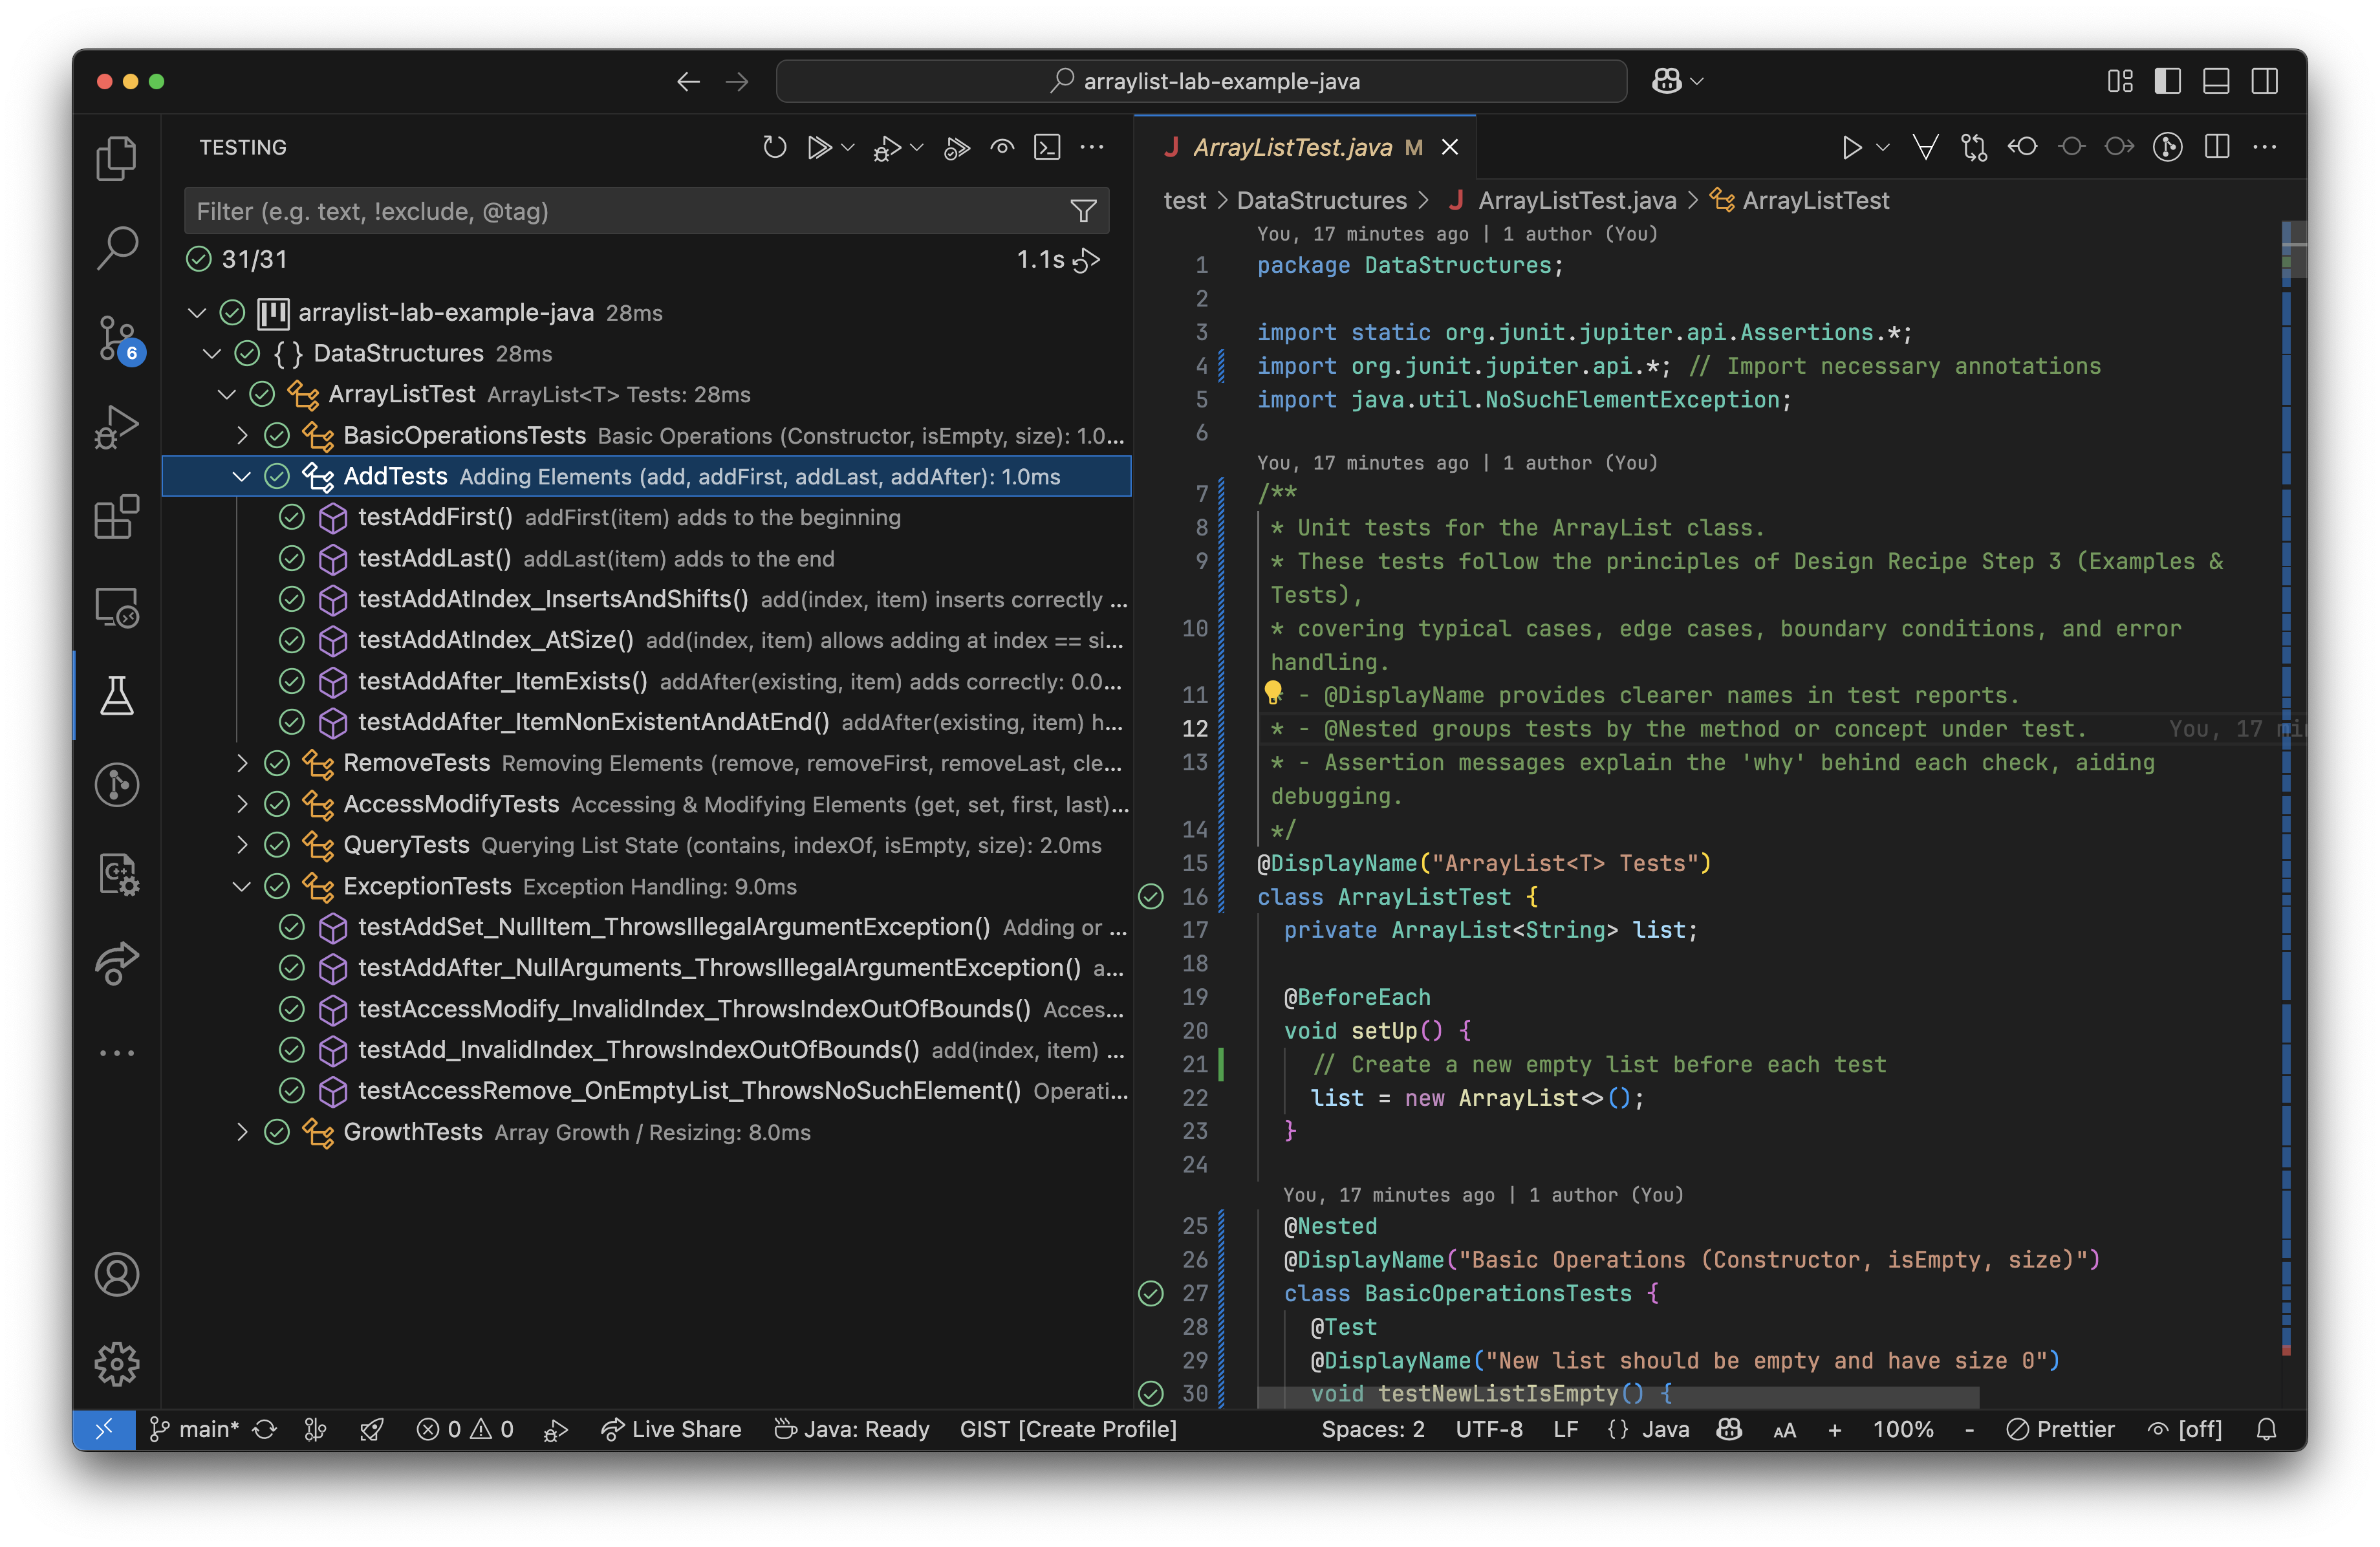
Locate the Tests: The Test Explorer pane will scan your project (using Gradle behind the scenes) and display the tests it finds. You should see a hierarchy, likely starting with the project name, then packages (DataStructures), the test class (ArrayListTest), and potentially nested groups corresponding to the methods being tested, as shown in the example figure below.
Run a Class/Group: You can hover over a class name (like ArrayListTest) or a nested group and click the play icon that appears next to it to run only the tests within that class or group.
Remember, your task is to implement src/DataStructures/ArrayList.java so that it *passes* the provided tests in test/DataStructures/ArrayListTest.java. You should not modify the test file itself. The tests represent the requirements your implementation must meet.
Green Checkmark (✅): Success! The test ran without error and all its internal checks (assertions) passed. This indicates the specific piece of functionality tested by that method is likely working correctly according to the examples from Step 3.
Red X (❌): Failure! The test did not pass. This is the crucial feedback indicating a problem in your ArrayList.java implementation related to the scenario that test covers.
Timing: The view often shows how long each test or group took to run (e.g., "1.0ms"). This isn’t usually critical for correctness but can be useful later for performance analysis.
Identify the Failed Test: Note the name of the test method that failed (e.g., testAdd_InvalidIndex_ThrowsIndexOutOfBounds). The names are often descriptive of the scenario being tested.
An AssertionError: This is common. It means your code ran, but produced the wrong result. The message typically tells you what was expected versus what was actually returned by your code (e.g., expected: but was: ).
An Unexpected Exception: Your code might have crashed by throwing an exception when none was expected (e.g., you got a NullPointerException inside your add method). The output will show the exception type and a stack trace (a list of method calls leading to the error), helping you find where in *your* code the crash occurred.
A Missing Exception: The test might have expected a specific exception (like IndexOutOfBoundsException) based on the contract, but your code didn’t throw it when it should have.
Connect to Your Code & Examples: Use the test name and failure message to figure out which method in your ArrayList.java is likely causing the problem and under what circumstances (which example from Step 3 does this test correspond to?).
This iterative cycle (implement --> run tests --> analyze failures --> debug --> re-run tests) is how you will build your ArrayList incrementally, using the tests as a constant guide and safety net.
Now that you understand how to use the provided tests to check your work, you have the final piece needed before planning the implementation details. In the next sections, we will move to Design Recipe Step 4, creating skeletons and pseudocode for the ArrayList methods based on the understanding gained in Step 0 and the examples defined in Step 3.