
GitKit (2nd ed.): Learn git and GitHub in Context

Section 3.7 Pushing a Branch to Your Origin

You have made the changes necessary to address the issue you were assigned, and you are now ready to upstream those changes. In order to do that, the first step is to get the changes you have made into GitHub so that the upstream maintainers can be told about them.

Exercises

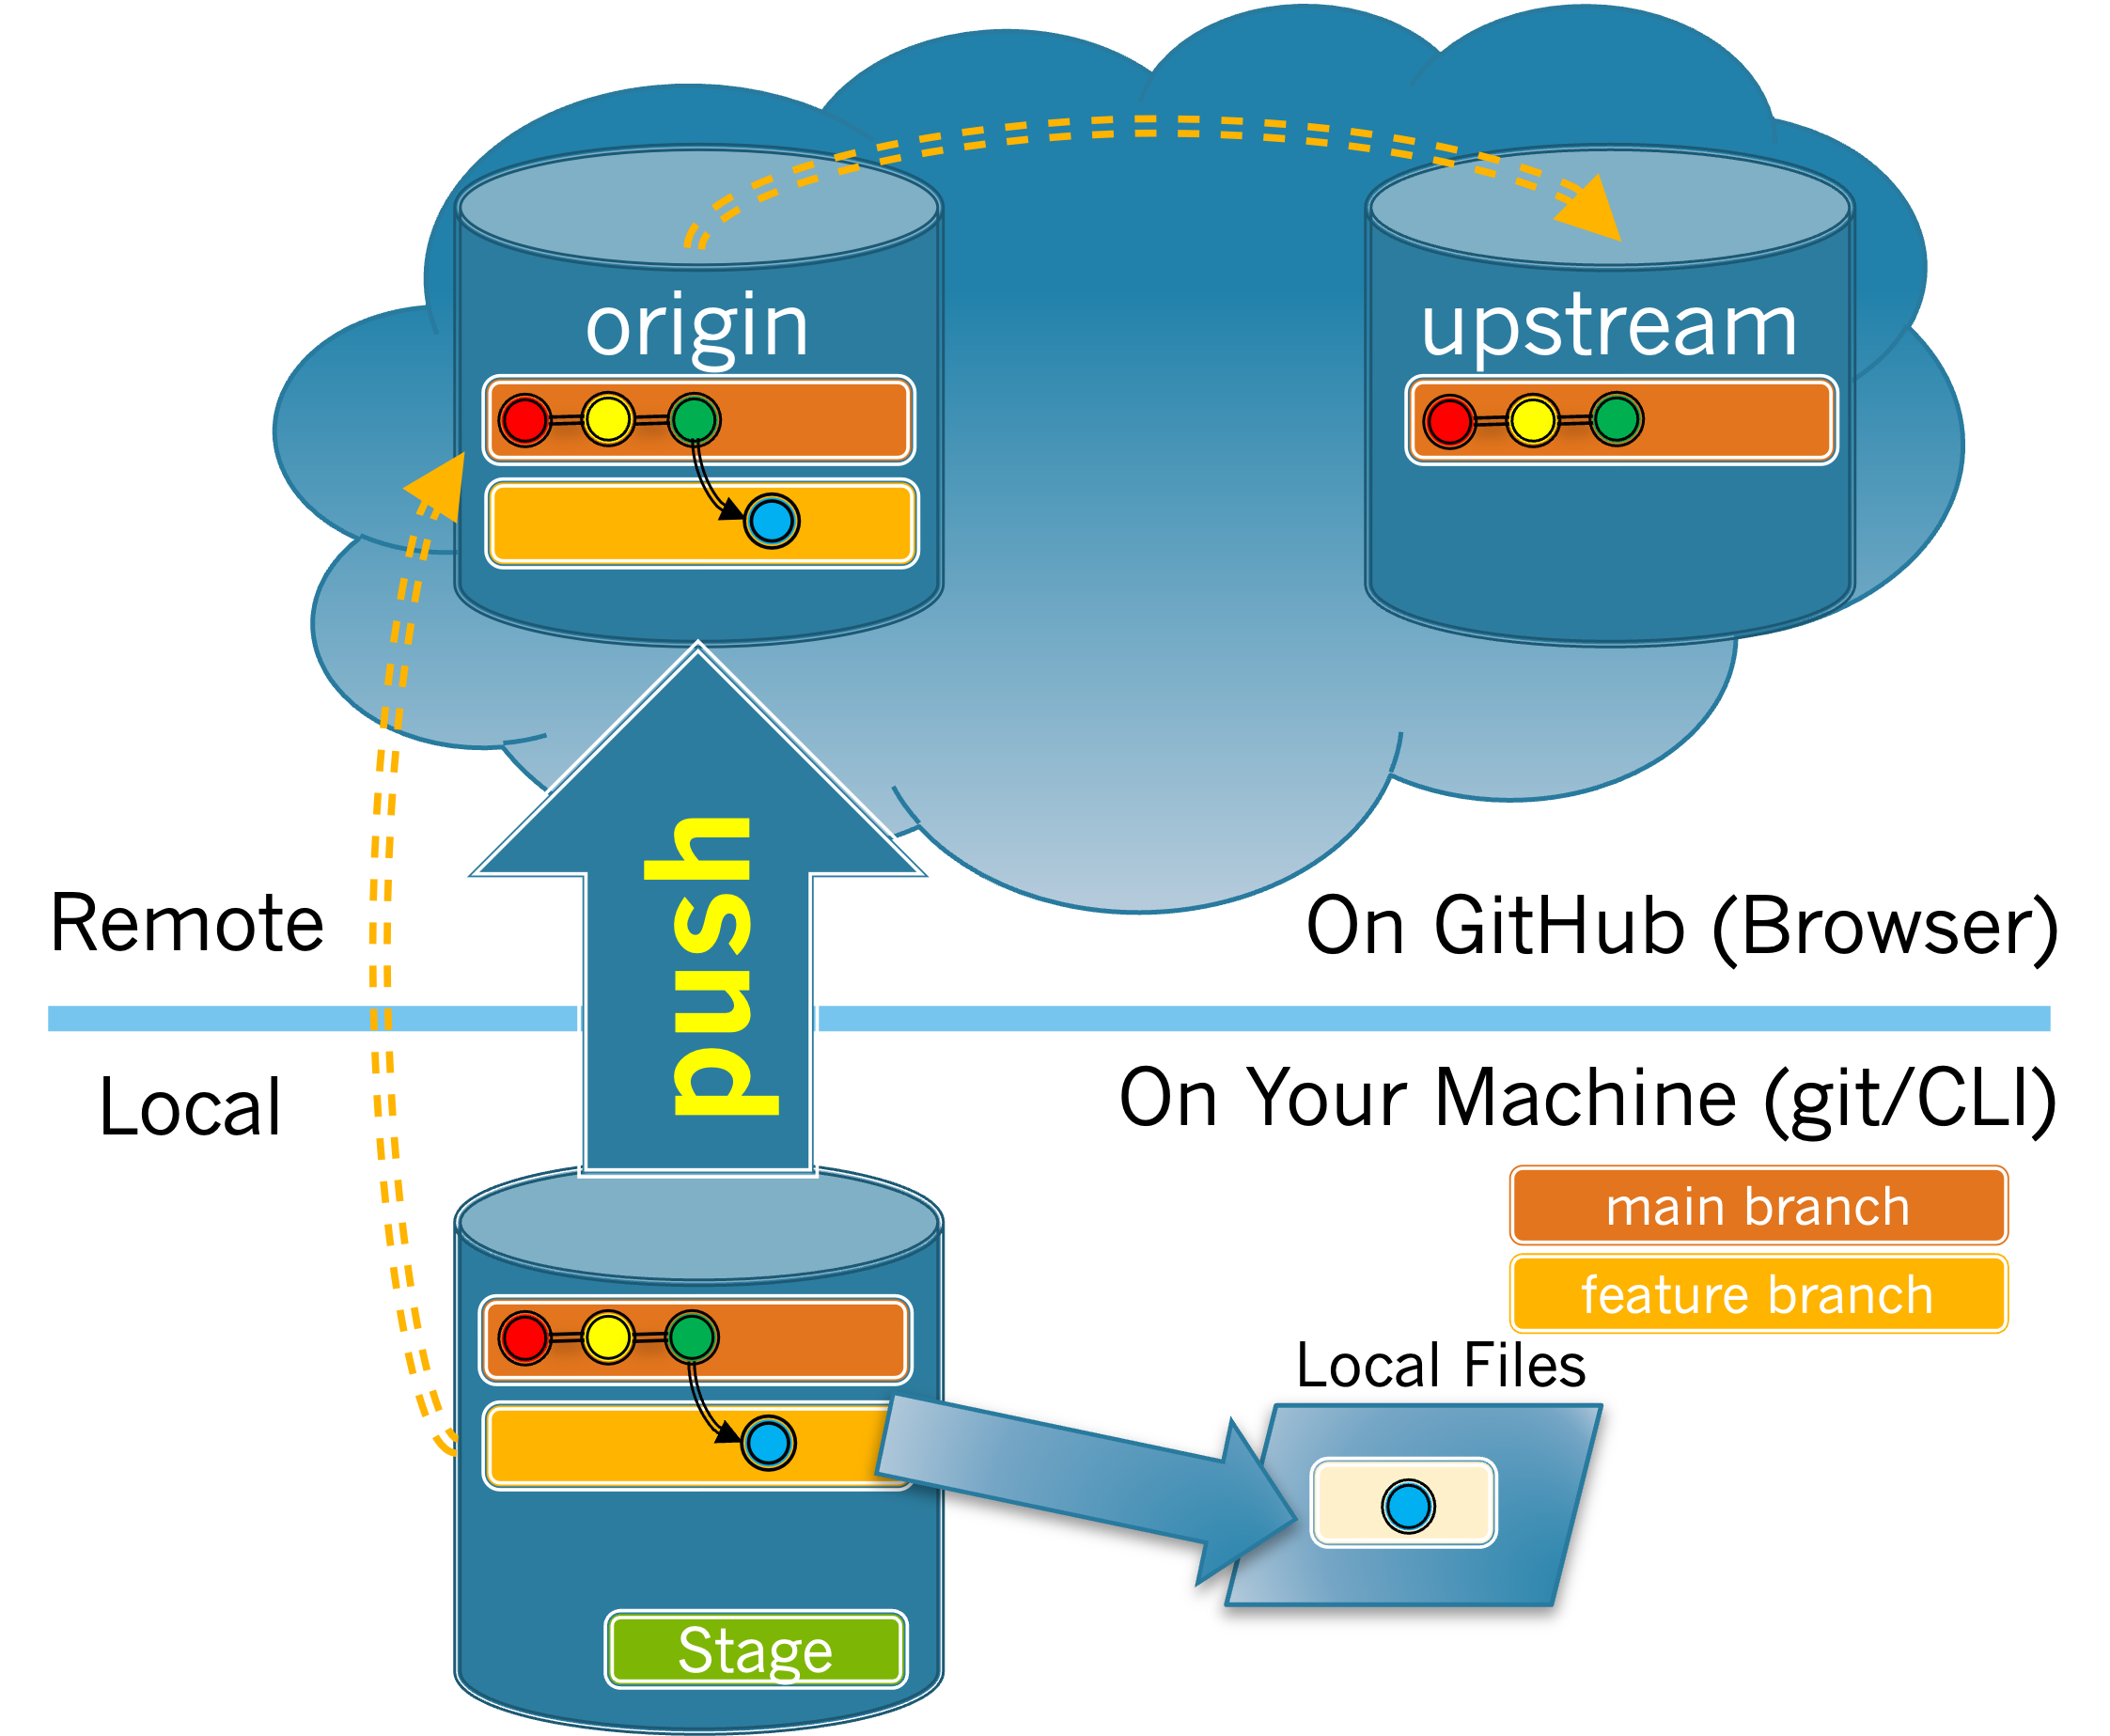
As shown in Figure 3.7.1, this is done by pushing your feature branch to your origin repository. More generally, pushing a branch, copies it from a local repository to a remote repository.
Cloud image of the feature branch to be merged into your origin repository.
Figure 3.7.1. Push Feature Branch to Origin.

1.

    The git branch command lists all of the branches that exist in your local repository.
    How many branches are in your local repository?
  • 1 - main
  • Look again, you should see more than just the main branch.
  • 1 - feature branch that you created in Task 3.2.1.b
  • Look again, you should see more than just the feature branch.
  • 2 - main and feature branch that you created in Task 3.2.1.b
  • Correct! Your local repository will have both the main branch and your feature branch.
  • 3 or more with differing branch names
  • If you have more than 2 branches perhaps you created a feature branch multiple times by accident.
Hint.
Refer to Figure 3.7.1 and look at the local branches on your machine.

2.

Use your browser to look at your origin repository on GitHub.
(a)
    How many branches appear in your origin repository on GitHub?
  • 1 - main
  • Correct! There is only 1 branch, main in your origin repository on GitHub.
  • 1 - feature branch that you created in Task 3.2.1.b
  • Look again, your feature branch should not be listed in GitHub as it is only in your local repository.
  • 2 - main and feature branch that you created in Task 3.2.1.b
  • Look again, your feature branch should not be listed in GitHub as it is only in your local repository.
  • 3 or more with differing branch names
  • Perhaps you aren’t in your origin repository. Make sure you see your GitHub userid in the upper left hand corner of your GitHub tab.
Hint.
Make sure you are in your origin repository, not the upstream repository. Refer to Figure 3.7.1 and look at the origin to see what branches appear on GitHub.
(b)
    Why is there a difference between the branches in your origin repository and your local repository?
  • You created a branch in your local repository but it does not appear in the origin repository yet.
  • Correct!
  • You created a branch in the origin repository but it does not appear in your local repository.
  • Your branch is in your local repository, not the origin repository.
  • Someone else created a branch in the origin repository.
  • Branches are created in the local repository. It is possible that someone else created a branch in their local repository and pushed it to their origin. You have a different origin repository so you would not see it.
  • Someone else created a branch in their local repository and it appears in the origin repository.
  • It is possible that someone else created a branch in their local repository and pushed it to their origin. You have a different origin repository so you would not see it.
Hint.
All the work you have done in this chapter is on your local machine. What should be appearing in your local repository that is not in the origin repository?
Pushing your Feature Branch:

3.

    The git push <remote> <branch> command will push the specified branch of your local repository to the specified remote repository (i.e. on GitHub).
    You will need to push your feature branch from your local repository to your origin repository on GitHub. You have given your remote repository the name origin which you can use instead of the full URL. For example, git push origin <branch> and the name of your branch where you committed your change. Type the command now.
    The output should not contain any error messages. If you see error messages, make sure you spelled your branch name correctly and your command is in the proper format and does not include < >. The last few lines should also give you some indication that your push was successful. Look at the last two lines of output produced.
  • The second to last line is the URL of the origin repository.
  • Correct!
  • The last line provides the name of the branch in the local repository that was pushed to the origin repository.
  • Correct!
  • The second to last line is the URL of your local repository.
  • Your local repository does not have a URL, it is on your local machine.
  • The last line provides the URL of the branch in the local repository that was pushed to the origin repository.
  • This shows the name of the branch, not a URL.
Hint.
There are several lines of output that mention deltas. Ignore these. Make sure you are looking at the last two lines - the first of which begin with To and the second of which begins with a hexademical code.

4.

    Visit your origin repository on GitHub and check that the branch was pushed. You may have to reload the page.
    How can you tell your branch was pushed?
  • The number next to the Branches link is now 2.
  • Correct! The number of branches should have increased.
  • When I click on Branches my branch is now listed in addition to main.
  • Correct! You should be able to see both branches on this page.
  • The number of issues has increased.
  • Pushing a branch will not create an issues.
  • The number of pull requests has increased.
  • Pushing a branch will not create a pull request.
Hint.
There are multiple ways you can tell that your branch has been pushed by looking at the origin repository on GitHub.
You have attempted 1 of 6 activities on this page.