This instructor guide contains everything you need to know to use GitKit in your course. Subsection 1.1.1 Quick Start gives a concise guide that may be sufficient if you have used GitKit previously and just need the bare minimum of reminders of what to do. Subsection 1.1.2 Adopting and Using the GitKit provides a more detailed guide to getting familiar with the GitKit and using it in your course.
This quick start guide provides a very brief outline of the steps necessary to use the GitKit in a course. It is intended to be sufficient for instructors who have used the GitKit previously and just need a reminder of the necessary steps. Subsection 1.1.2 Adopting and Using the GitKit provides a more detailed guide to adopting the GitKit for use in a course.
Note that the reading assignments in the course pack include sections that allow students to elect to participate in a research project aimed at (1) understanding what they think and know about open source tools and techniques and (2) assessing the effectiveness of the GitKit. The inclusion of these sections is optional and they may be removed at the discretion of the instructor. See Subsection 1.1.7 Creating a Runestone Course using the GitKit Text for additional information.
One deploy of the GitKit FarmData2 repository can support up to 32 students. Perform as many deploys as necessary for your course. Be sure to give each deploy a distinct name when prompted by the deployer.
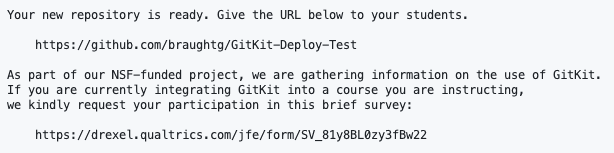
Please consider clicking the link to the brief survey that is included in the output of the GitKit deployer. Your feedback helps us to better understand where and how the GitKit is being used. This survey can also be accessed here.
This section outlines a process for learning more about the GitKit and adopting it for use in a course.
Read Subsection 1.1.3 Delivering GitKit to understand the basic structure of the GitKit and the variety of ways that it has been delivered to learners.
Consider doing the GitKit for yourself as described in Subsection 1.1.8 Doing the GitKit Yourself. This is by far the best way to prepare to deliver the GitKit to a class.
Refer to Subsection 1.1.10 Instructor Materials for links to the chapters, the class slides, and instructor notes as you teach each chapter of the GitKit.
Refer to Subsection 1.1.11 Contributing to GitKit for information about contributing to the GitKit including where to report typos, errors, suggested improvements, feature requests or bugs.
The GitKit content is broken into 4 chapters (See Subsection 1.1.4 GitKit Content). Each chapter of the text contains the set of hands-on exercises to be completed by the students. These exercises are not intended to stand alone. Each requires some prior introduction to the concepts and terminology that they use. A separate set of slides are provided for each topic that instructors can use or adapt to introduce the necessary concepts and terminology before students complete each set of hands-on exercises.
While the GitKit was designed for nominal delivery in four 50-75-minute periods with 2-3 hours of additional hands-on work by the students, instructors have found the GitKit to be adaptable to different educational settings, student experience levels and learning objectives. Some examples include:
Limited Coverage: The first two GitKit topics form a cohesive unit and can be completed without continuing onto the final two topics.
Lower Level Courses: In lower level courses, or with less experienced students, the first two topics could be spread over a longer time with the hands-on activities being completed in class.
A One Day Workshop: An organization has delivered the GitKit as a one-day workshop for students from low-income, first-generation, underrepresented minority backgrounds. This workshop covered just the first two GitKit topics.
Students with Prior Git Experience: An instructor with students who have had prior exposure to Git fundamentals (but not GitHub or the forking workflow) have skipped most of the class materials and used the hands-on activities as in-class lab activities rather than homework.
Alternative In-Class Activities: Instructors have had success using Process Oriented Guided Inquiry (POGIL) activities in class in place of the slides provided with GitKit.
Provides practice with setting an upstream remote, pulling (non-conflicting) changes from upstream, and deleting feature branches. The exercises also provide repetition of practice with the skills from the previous chapters.
The GitKit provides a cloud based development environment that students use to complete the hands-on GitKit activities. This development environment, which we call a KitClient, runs on GitHub Codespaces. It provides all of the tools and configuration necessary to complete the activities. The development environment also includes the Kit-tty Virtual Assistant (See Subsubsection 1.1.5.1 The Kit-tty Virtual Assistant and a set of automations that simulate aspects of an open source project community (See Subsubsection 1.1.5.2 Community Automations).
Note: If you are familiar with GitHub Codespaces, you will find that the interface familiar. However, the KitClient works slightly differently than a standard Codespace. In particular, when students open the KitClient no repository will be opened. Instead they are given a blank development environment into which they git clone the repository they will be using for the GitKit. This makes explicit the important concept of a clone, which Codespaces hide.
The Kit-tty (a play on Kit and TTY), pronounced kitty, is a virtual assistant built into the development environment. The Kit-tty has been designed to catch and correct student errors that were frequently observed in early uses of the GitKit. Many of the errors caught by the Kit-tty are those that would not be discovered until students progress several steps further into the activity, at which point they can be difficult to undo.
Community automations perform actions and comment on tickets in the issue tracker and on pull requests. These actions and comments are designed to simulate some common types of interaction with project maintainers and other FOSS community at appropriate points in the learning activities.
Students claim an issue by adding a comment to its ticket in the issue tracker. An automation notices this comment and assigns the issue to the student (if it hasn’t already been assigned to someone else). The automation then also responds personally as a maintainer might: "Great! I assigned you (@TheirUsername) to the issue. Have fun working on it!"
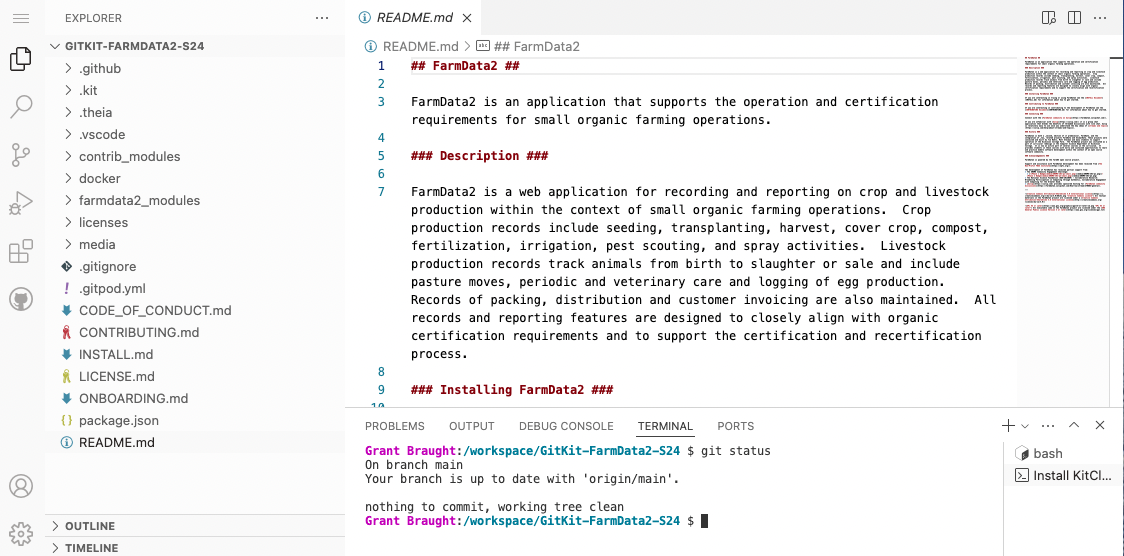
The upstream repository deployed by the GitKit was captured from the FarmData2 project. FarmData2 aims to support farmers in the day-to-day operation and record keeping needs of their small organic diversified vegetable farms.
While FarmData2 focuses on farming operations, students completing the GitKit activities work only with documentation files in markdown. Thus, there is no farming knowledge required to compete the GitKit.
The captured repository is from an earlier version of FarmData2. Current active development work on FarmData2 is occurring in the FarmData2 Organization on GitHub.
Subsection1.1.7Creating a Runestone Course using the GitKit Text
The GitKit text is an e-text that is available on Runestone Academy. It contains a large number of interactive elements, (nearly) all of which are auto-graded and provide immediate feedback to students as they work through the GitKit. If you are not familiar with Runestone Academy it is recommended that you read the first 6 sections of the Using eBooks with Runestone Academy guide to familiarize yourself with it.
You can either create assignments for your students from the GitKit sections and exercises, or you can Copy the Course Pack for the GitKit from the gitkit base course into your course.
The course pack includes a reading assignment and a problem assignment for each of the chapters of the GitKit text (except Chapter 1 Instructor Guide). The provided reading assignment for each chapter includes all sections of the chapter and is auto-graded based on student interaction with each of the chapter’s sections. The provided problem assignment for each chapter includes every interactive exercise in the chapter. Exercises are auto-graded graded using % Correct and the students last answer.
If you adopt the course pack you can modify the sections and questions that are included in the assignments, how they are graded and also add your own questions. See the Working with Assignments section of the Using eBooks with Runestone Academy guide for more details.
Note: The reading assignments in the course pack include sections that allow students to elect to participate in a research project aimed at (1) understanding what they think and know about open source tools and techniques and (2) assessing the effectiveness of the GitKit. In addition, there are surveys at the end of each chapter by which students can provide feedback to help improve the GitKit for future students.
Section 2.1 GitKit Pre-Survey also allows students to consent to providing the GitKit authors with their responses to all of the GitKit exercises. If you would like to provide the GitKit authors with exercise responses from students in your course who consented please contact Dr. Braught (braught@dickinson.edu) Professor of Computer Science at Dickinson College for additional information.
Completion of any of these surveys is completely optional. The authors hope that you will leave these sections in the assignments to give your students the option to complete them. However, if you prefer not to include them they can be removed from the reading assignments in Assignments tab on the Instructor’s Page for your course.
These surveys have been approved by the Institutional Review Board (IRB) at Western New England University. If you have any questions about this study, you may contact either: Faculty contact: Dr. Ellis (ellis@wne.edu) Professor, Computer Science and Information Technology department, Western New England University, or IRB contact: Dr. Jess Carlson, Professor of Psychology, jessica.outhouse@wne.edu.
By far the best, and highly recommended, way to prepare to deliver the GitKit is to do it yourself by playing the role of both the instructor and the student simultaneously. Use the following steps to do the GitKit yourself:
To use the GitKit the instructor for the course must deploy one or more instances of it. Deploying an instance of the GitKit creates a repository that students use as the upstream repository for the hands-on activities.
Use the following steps to deploy an instance of the GitKit FarmData2 repository for use in your course:
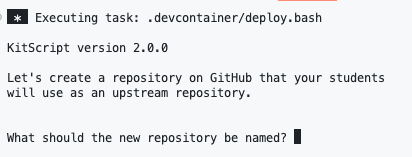
Click here to start the deployer. It takes a few minutes to create the codespace you’ll use to deploy the GitKit. You are ready to continue when the prompt looks similar to Figure 1.1.2. You may need to resize of your terminal to see all of what’s shown below.
Figure1.1.2.The deployer running and ready for input.
Respond to the deployer prompts that appear in the window. It will ask you for:
The OWNER for the new repository on GitHub. The OWNER can be your GitHub account or a GitHub organization that you have created for your course and for which you have write permission.
Note: If you will need multiple repositories, each deployed repository must have a unique name. We recommend appending suffixes to "GitKit-FarmData2" for example "GitKit-FarmData2-group1", "GitKit-FarmData2-group2", etc.
Note: To paste try CTRL+V (CMD+V on Mac). If that doesn’t work try CTRL+SHIFT+V (CMD+SHIFT+V). You’ll know if it works because you will be prompted by Codespace to allow the operation. Be sure to allow it. Once you have allowed the operation, it has succeeded. Your PAT will not be echoed in the terminal. Just press enter to continue.
Wait for the deployer to complete. This typically takes several minutes because the deployer must create the issues in the issue tracker slowly to avoid being rate-limited by the GitHub API.
Note that each deployed GitKit can support up to 32 students. If you have more than 32 students, you will need to rerun the deployer. The deployer provides instructions for rerunning the deployer without starting a new Codespace. Alternatively, you can repeat the steps above.
Each deployed repository must have a unique name. We recommend appending suffixes to "GitKit-FarmData2" for example "GitKit-FarmData2-group1", "GitKit-FarmData2-group2", etc.
Please consider visiting the link to the brief survey that is included in the output of the GitKit deployer. Your feedback helps us to better understand where and how the GitKit is being used. This survey can also be accessed here.
The following links provide easy access to the chapters with the hands-on exercises, the presentation slides for each chapter and a set of instructor notes for each chapter. The Instructor Notes for each chapter include Slide Notes, a To-Do List, and Exercise Notes. The Slide Notes give an overview of the slides and then slide-by-slide information for the instructor. The To-Do List enumerates any tasks that the instructor should be sure to do before the class meeting. The Exercise Notes provide some helpful comments on specific hands-on exercises.
All of the work on the GitKit is being conducted under open licenses (GPL3, CC-BY-NC-SA) and we welcome participation, contribution and derivative work.