Skip to main content
Contents Dark Mode Prev Up Next Profile \(\newcommand{\N}{\mathbb N} \newcommand{\Z}{\mathbb Z} \newcommand{\Q}{\mathbb Q} \newcommand{\R}{\mathbb R}
\newcommand{\lt}{<}
\newcommand{\gt}{>}
\newcommand{\amp}{&}
\definecolor{fillinmathshade}{gray}{0.9}
\newcommand{\fillinmath}[1]{\mathchoice{\colorbox{fillinmathshade}{$\displaystyle \phantom{\,#1\,}$}}{\colorbox{fillinmathshade}{$\textstyle \phantom{\,#1\,}$}}{\colorbox{fillinmathshade}{$\scriptstyle \phantom{\,#1\,}$}}{\colorbox{fillinmathshade}{$\scriptscriptstyle\phantom{\,#1\,}$}}}
\)
Section 3.2 Creating a Feature Branch
When you set out to make changes to the project you will do so by working on a feature branch. The exercises in this section will walk you through the process of creating a feature branch on which you will fix the issue that you claimed in
Section 2.5 The Issue Tracker .
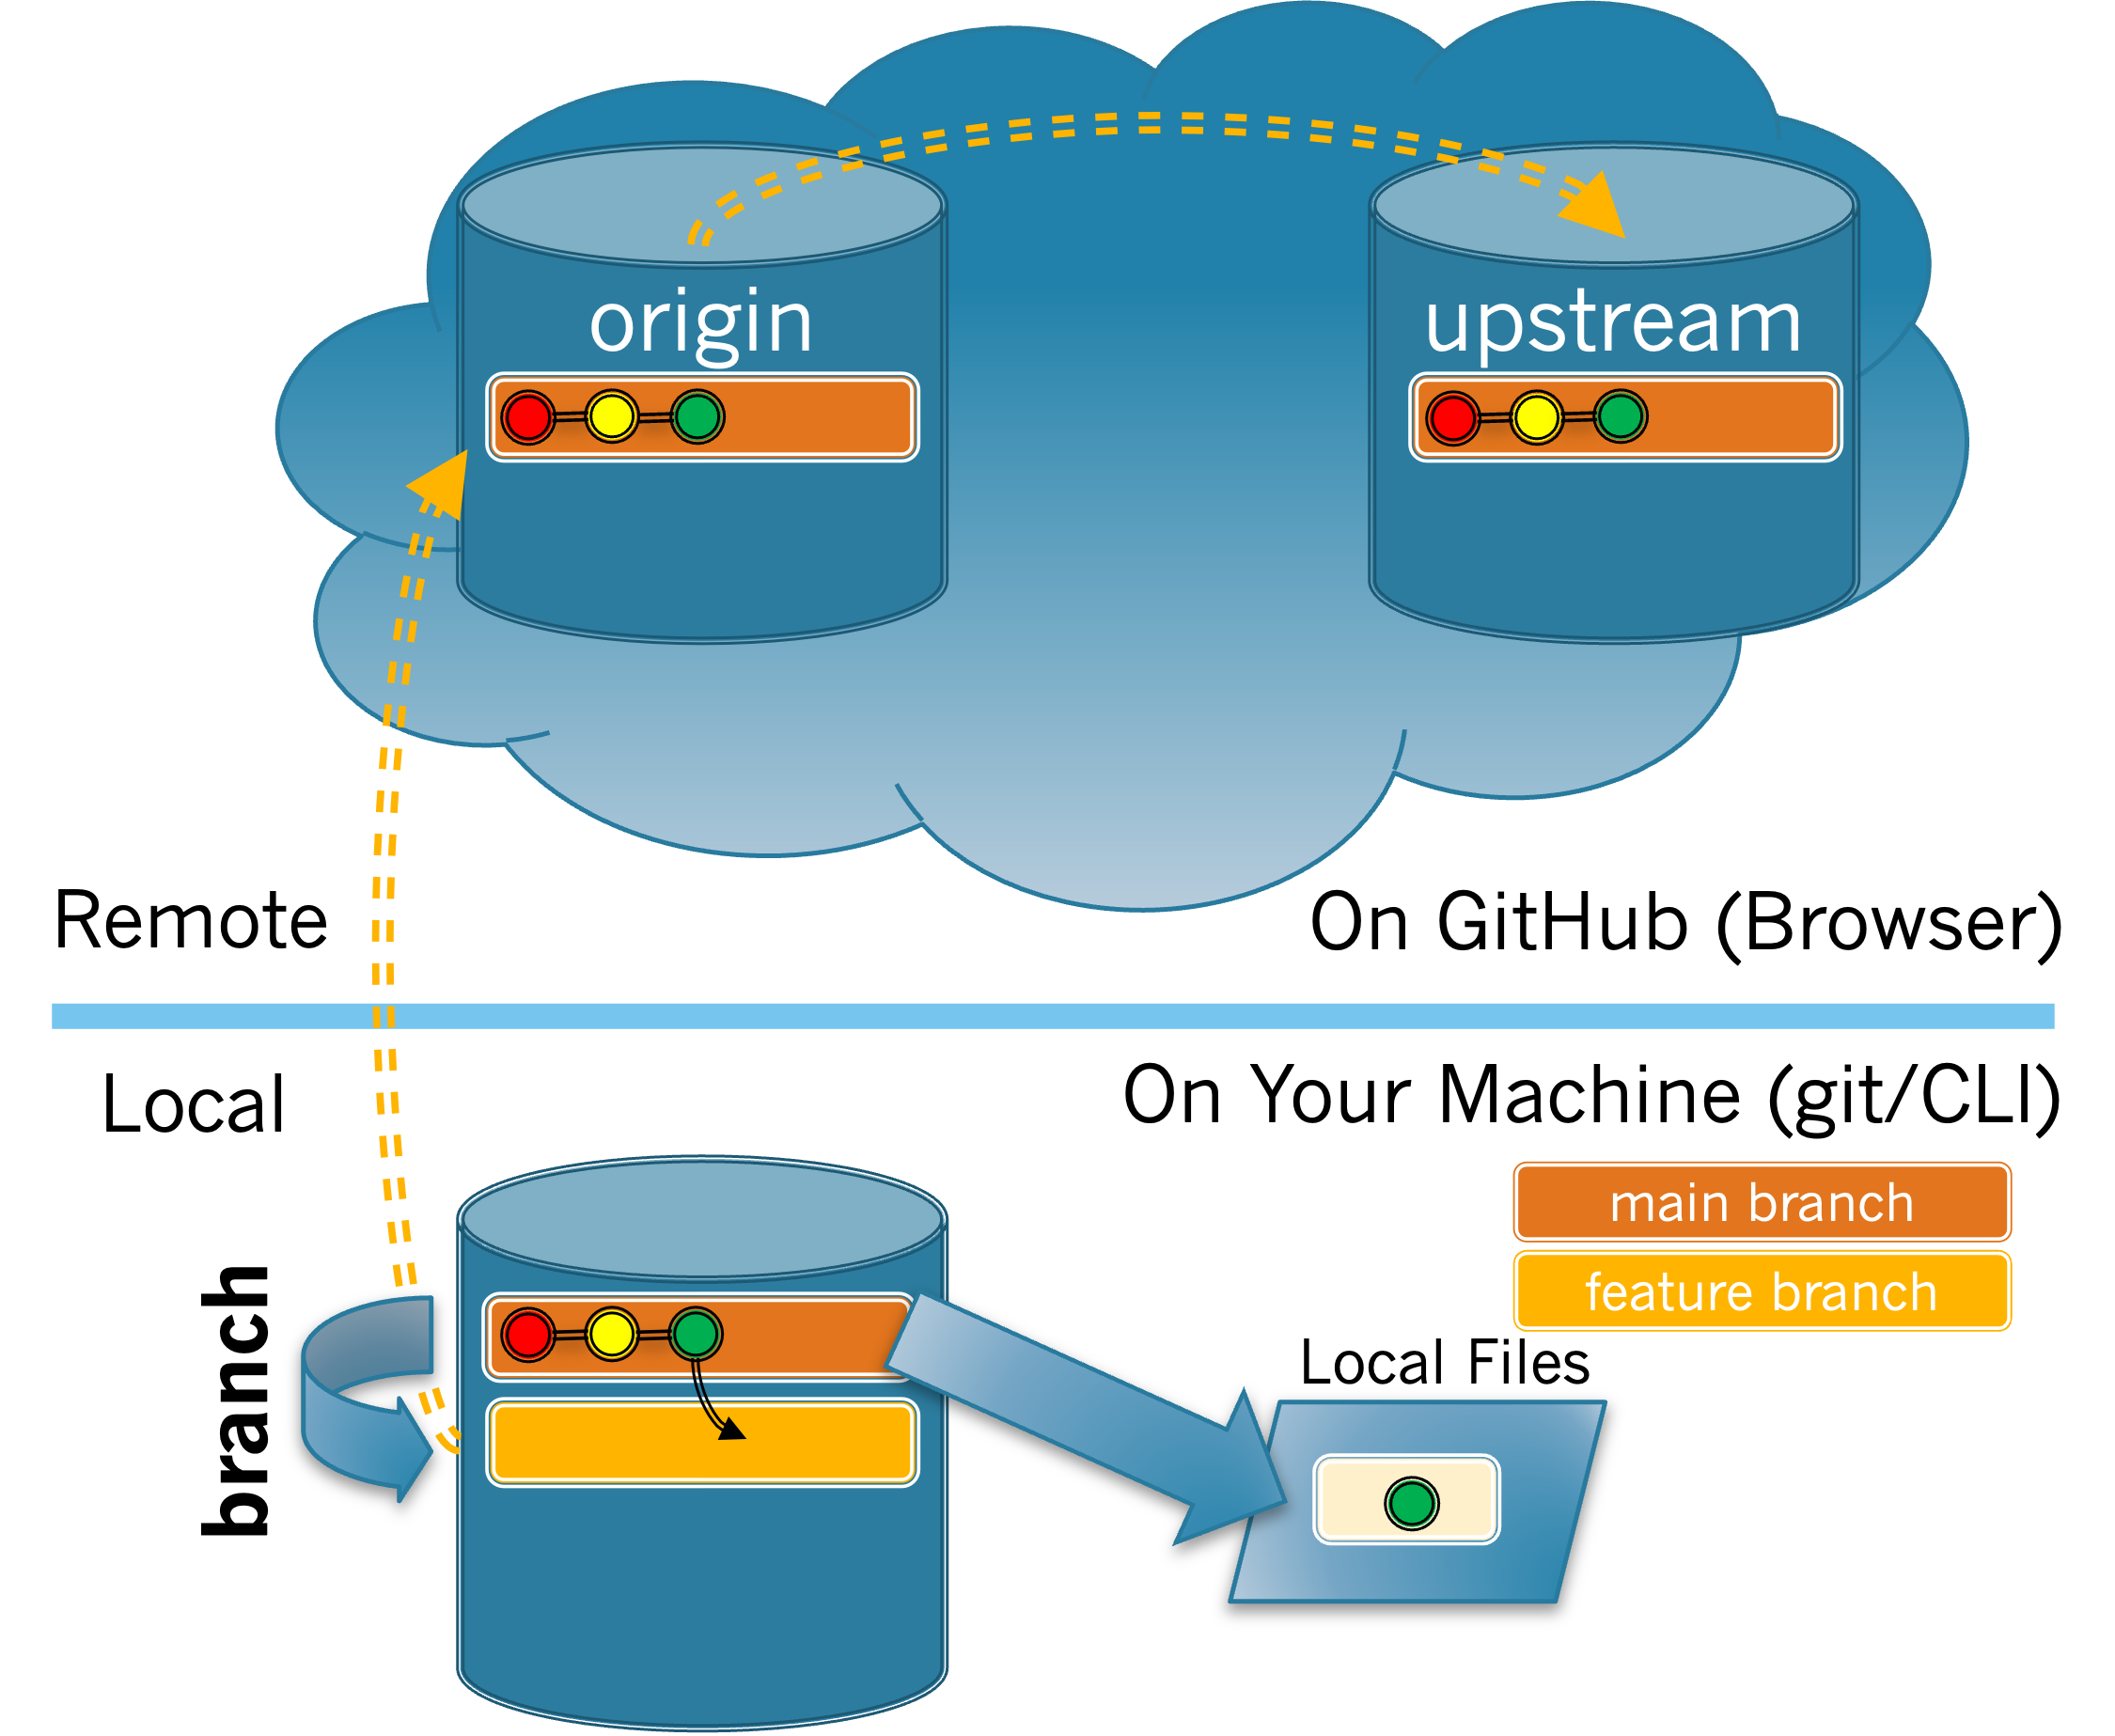
Figure 3.2.1 illustrates this process. The feature branch that you will create is shown in orange.
The new local branch is created from the active local branch. The new branch is not made active.
Figure 3.2.1. Create Feature Branch.
Exercises
1. The
git branch <name> command creates a new branch with the given
name . When creating a branch, you should give it a short but descriptive name (e.g.
fixTypoInReadme ). Note:
name may not have spaces, so you can use - (dashes) or CamelCaseText to divide words in your branch names. Remember not to include the < > when writing your own command.
(a)
If you want to create a new feature branch named
fixTypoInReadme , which command should you use?
git branch fixTypoInReadme
Correct!
git branch <fixTypoInReadme>
The command should not contain < >.
The command is missing git.
The command is missing branch.
Hint .
Look back at the format of the command in the previous description.
(b)
Adapt the command from
Task 3.2.1.a to create a branch for the issue you claimed. Type that command now.
What output was produced when you typed the
git branch command?
Correct!
It said the branch was created.
Look at the terminal window again.
It gave an error statement.
Your branch was not created. Make sure your branch name does not contain spaces and that you did not include < >.
The current branch is <branch name>.
Look at the terminal window again.
Hint .
Look back at the format of the command and make sure you type it correctly.
2. The
git branch command without the branch name lists all branches.
(a)
Type
git branch and look at the output produced. Assuming the branch you created was named
fixTypoInReadme , which of the following do you see listed?
Hint .
If you don’t see your branch name it means it was not created. Try creating it again using the format of the command from
Task 3.2.1.a .
(b)
By looking at the output provided by
git branch how can you tell which is the active branch?
It will have an * before the branch name.
The branch name will appear in green.
The branch name will appear in italics.
The branch name will appear in bold.
Hint .
There are two ways the active branch is indicated.
Refer back to
Figure 3.2.1 to see the process you just completed.
You have attempted
of
activities on this page.