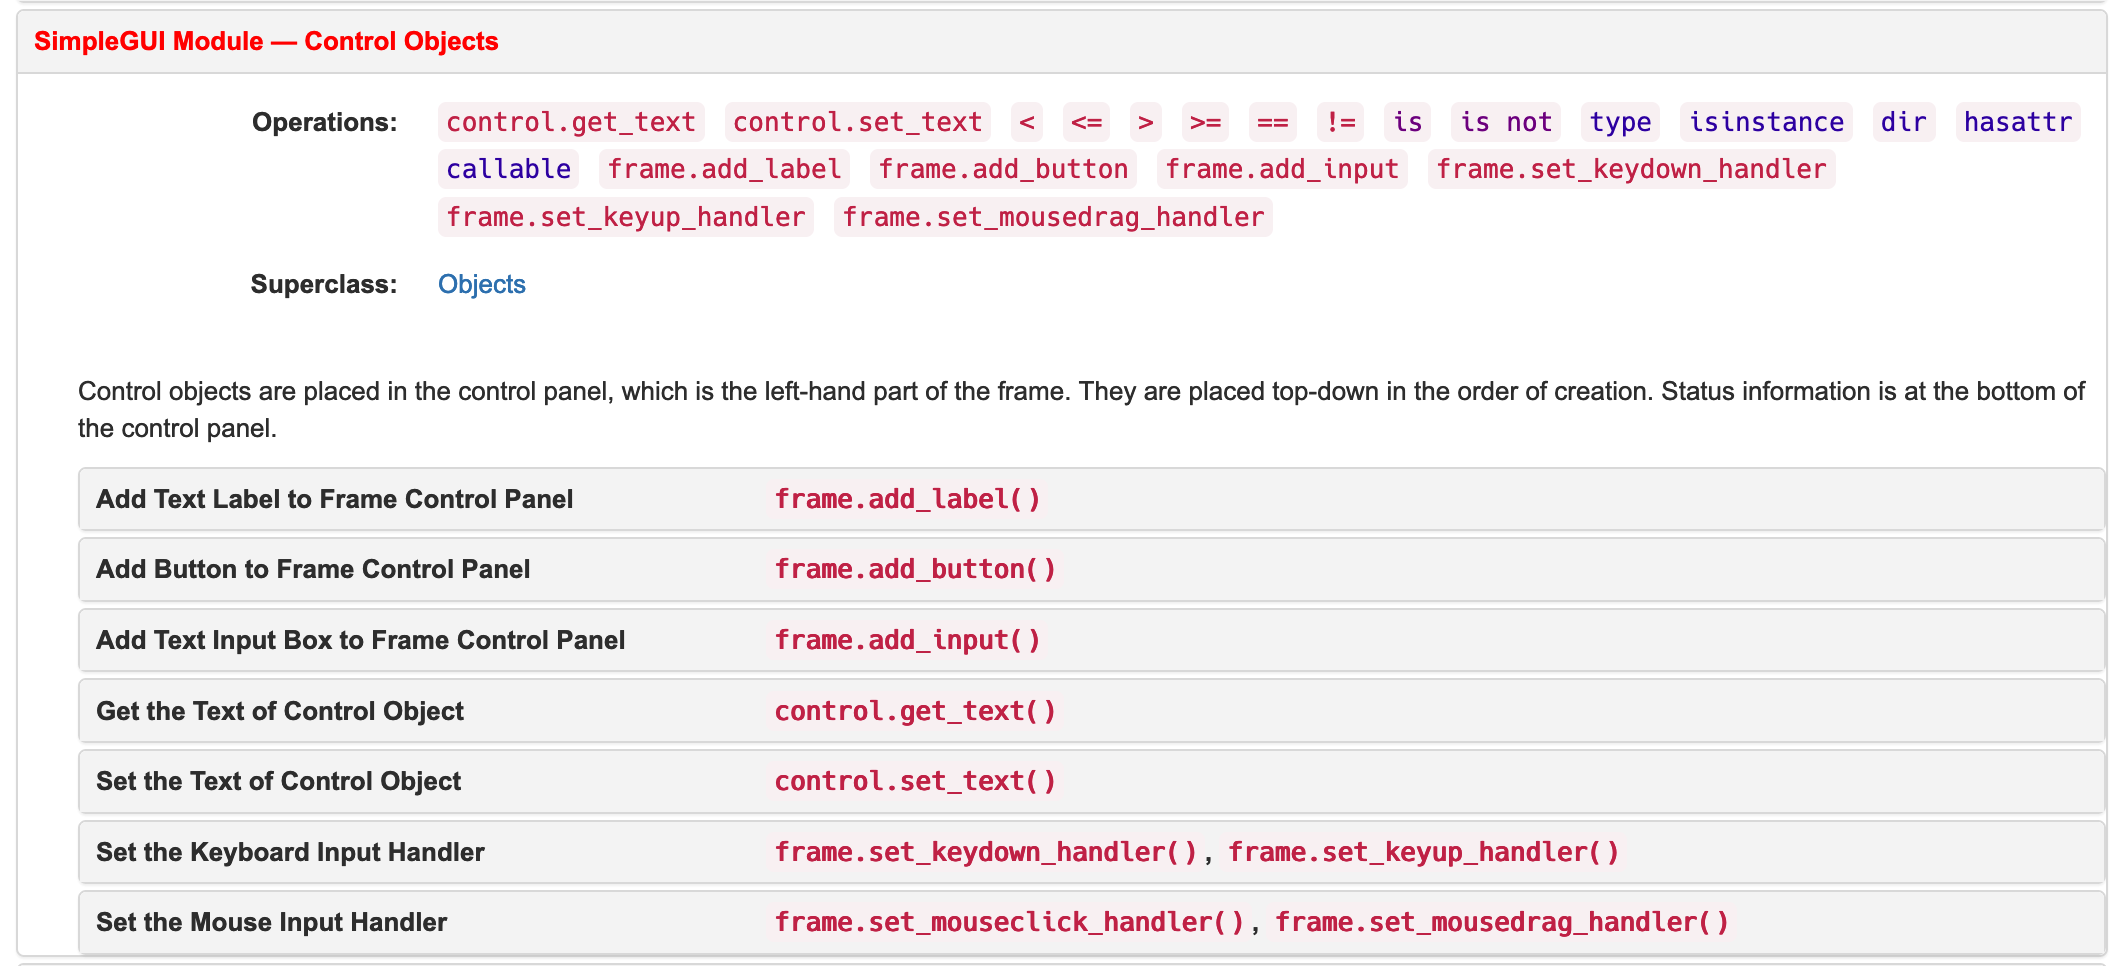
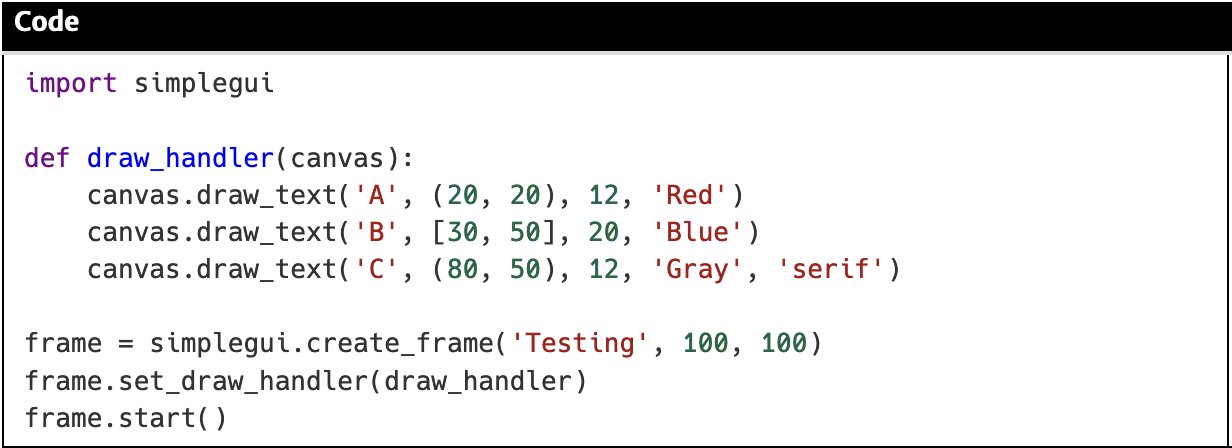
Section 10.5 Using Toolkit Documentation

There are many different toolkits that you can use for building GUIs (and for other things, too). Every toolkit handles input events slightly differently and offers slightly different sets of interface controls. So, one of the most important skills you can develop is learning how to read the documentation for a toolkit to figure out how to use it. No-one memorizes all the events and controls that a toolkit handles, unless they happen to use that toolkit every day. So, when seasoned programmers need to use a toolkit, they typically have the documentation window for that toolkit open in a browser, so they can refer to it as they build their program. Click the Docs button in the CodeSkulptor 3 interface to automatically open the documentation for you in a new browser tab: https://py3.codeskulptor.org/docs.html#tabs-Python. Switch to this tab and then click on Graphics Modules. You should see this:
The CodeSkulptor system has 3 different modules for graphical applications: SimpleGUI, SimpleMap and SimplePlot. We are only going to look at SimpleGUI (but you should feel free to explore the other two modules on your own). There are a number of different documentation sections for the SimpleGUI module. In order to build a GUI interface, what we are most interested in is the Control Objects, so click on that section to open it.
When you open this you will see that you can add various controls and user input handlers to a frame: labels, buttons, text input boxes, and keyboard and mouse event handlers. We’ll talk about the event handlers in the next section. For now let’s look at adding text labels. Click on the Add Text Label section and you will see the following:
There are three sections to the documentation for this function: Syntax, Example, and See also. The Syntax information shows how to use the command, including what parameters you need to specify. This particular documentation shows you that you can use the add_label() method on a window frame object. Assuming you have called your window ‘frame’, you simply type either ‘frame.add_label(“Label Text”) or you can add a width for the size of the label, like this: ‘frame.add_label(“Label Text”, 100)’. When you look at the Example information, it shows how to use this method in a complete code sample. Here you see that it is customary to assign a label to a variable called something like ‘label1’ or ‘label2’. Assigning a label (or other user interface widget) to a variable means you can access that widget to do things with it. The See also section tells you that there are some related methods you might want to know about. In this case, the related methods allow you to get the current text that a label is showing, and also change the text that a label is showing.
Check your understanding

Checkpoint 10.5.1.

    What is the correct order of required parameters (arguments) for the function, canvas.draw_text()?
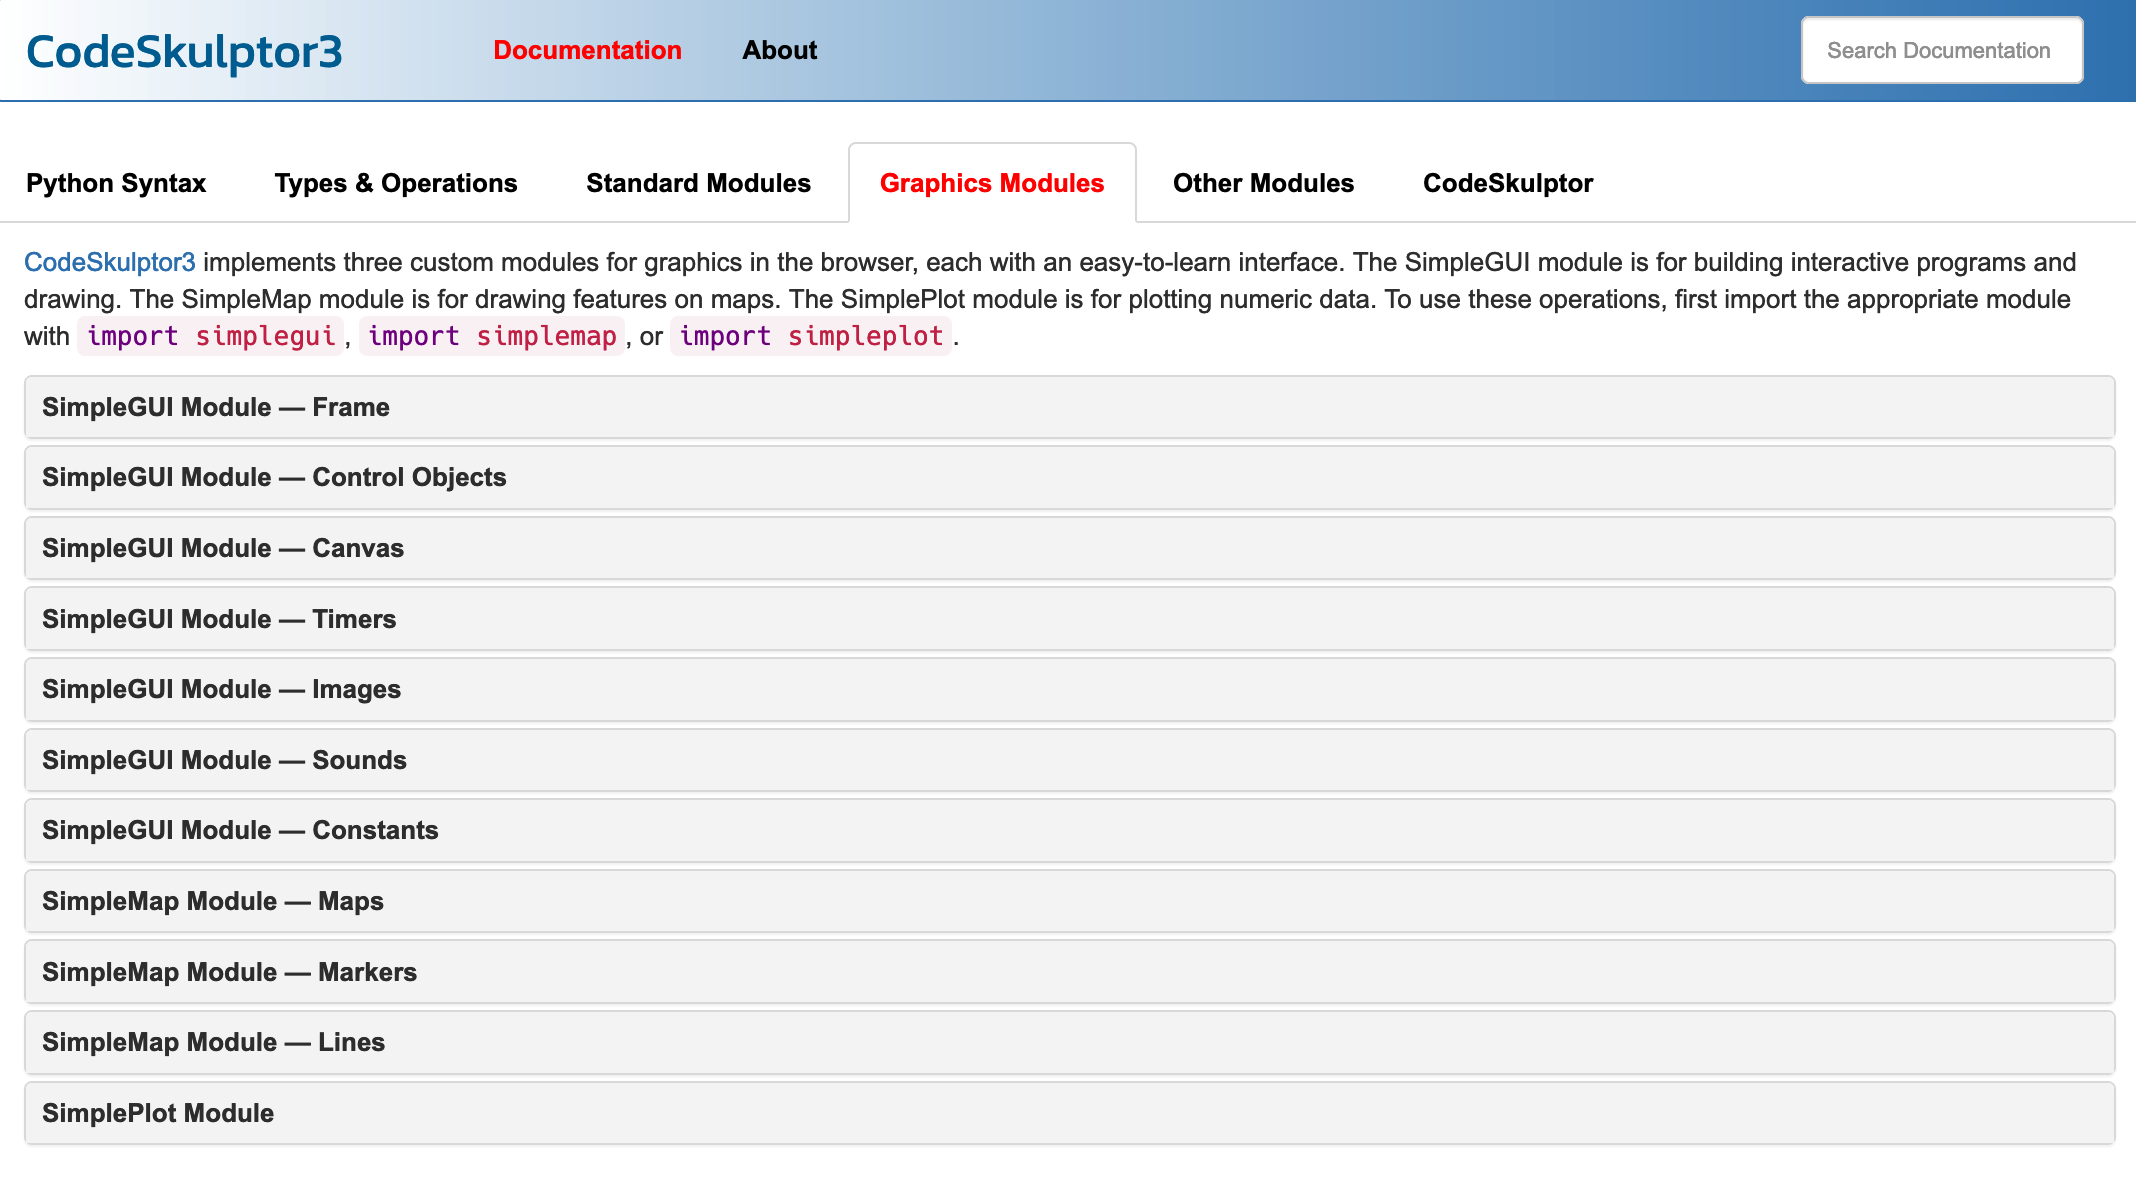
    The following image shows part of the documentation associated with this function. Review the complete documentation to find the answer: https://py3.codeskulptor.org/docs.html#draw_text
  • font color; font size; x,y coordinate; text
  • Incorrect. Consult the syntax part of the documentation for the answer.
  • x,y coordinate; font size; font color; text
  • Incorrect, check the documentation.
  • font size; text; x,y coordinate; font color
  • Incorrect, the documentation can help you find the answer.
  • text; x,y coordinate; font size; font color
  • Correct!

Checkpoint 10.5.2.

    import simplegui
     
    frame = simplegui.create_frame('Testing', 100, 100)
    label1 = frame.add_label('My first label')
    label2 = frame.add_label('My second label', 200)
    label3 = frame.add_label('My third label', 20)
    
    Copy and paste the above code into CodeSkulptor: https://py3.codeskulptor.org/
    What happens when you run this code?
  • An error prints to the console because the statement, frame.start(), is required.
  • Incorrect, the code still runs without this statement.
  • The first, second and third label are evenly spaced above the key and mouse indicators.
  • Incorrect, copy and paste this code into CodeSkulptor to find the correct answer.
  • The text for the third label overlaps with the key and mouse indicators.
  • Correct!
  • None of the above.
  • Actually, one of the above answers is correct. Run the code to see the output.

Checkpoint 10.5.3.

    What does the argument, 20, indicate in this line of code:
    label3 = frame.add_label(’My third label’, 20)
  • The font size for the text displayed on the label.
  • Incorrect, the documentation will quickly give you the answer.
  • The width size in pixels for the control panel area.
  • Incorrect, this argument has no effect on the control panel area.
  • The width of the label.
  • Correct!
  • The width of the text displayed on the label.
  • Incorrect, consult the documentation for the answer.
  • None of the above.
  • Actually, one of the above answers is correct. Consult the documentation for help.

Checkpoint 10.5.4.

    import simplegui
     
    frame = simplegui.create_frame('Testing', 100, 100)
    label1 = frame.add_label('My first label')
    label2 = frame.add_label('My second label', 200)
    label3 = frame.add_label('My third label', 20)
    
    Copy and paste the above code into CodeSkulptor: https://py3.codeskulptor.org/
    What effect would removing the argument, 20, have on this line of code:
    label3 = frame.add_label(’My third label’, 20)
  • An error prints to the console because this function requires two arguments.
  • Incorrect, the code still runs because the removed argument is optional.
  • The width of the label defaults to fit the width of the given text.
  • Yes, correct!
  • The text “My third label” is displayed on three separate lines.
  • Incorrect, run the code to see the actual result.
  • None of the above.
  • Actually, one of the above choices is correct. Run the code to find out the answer.
You have attempted of activities on this page.