Figure 5.4.1 shows the main branch has committed changes that conflict with what the local branch wants to commit.
Figure5.4.1.Resolving a Merge Conflict
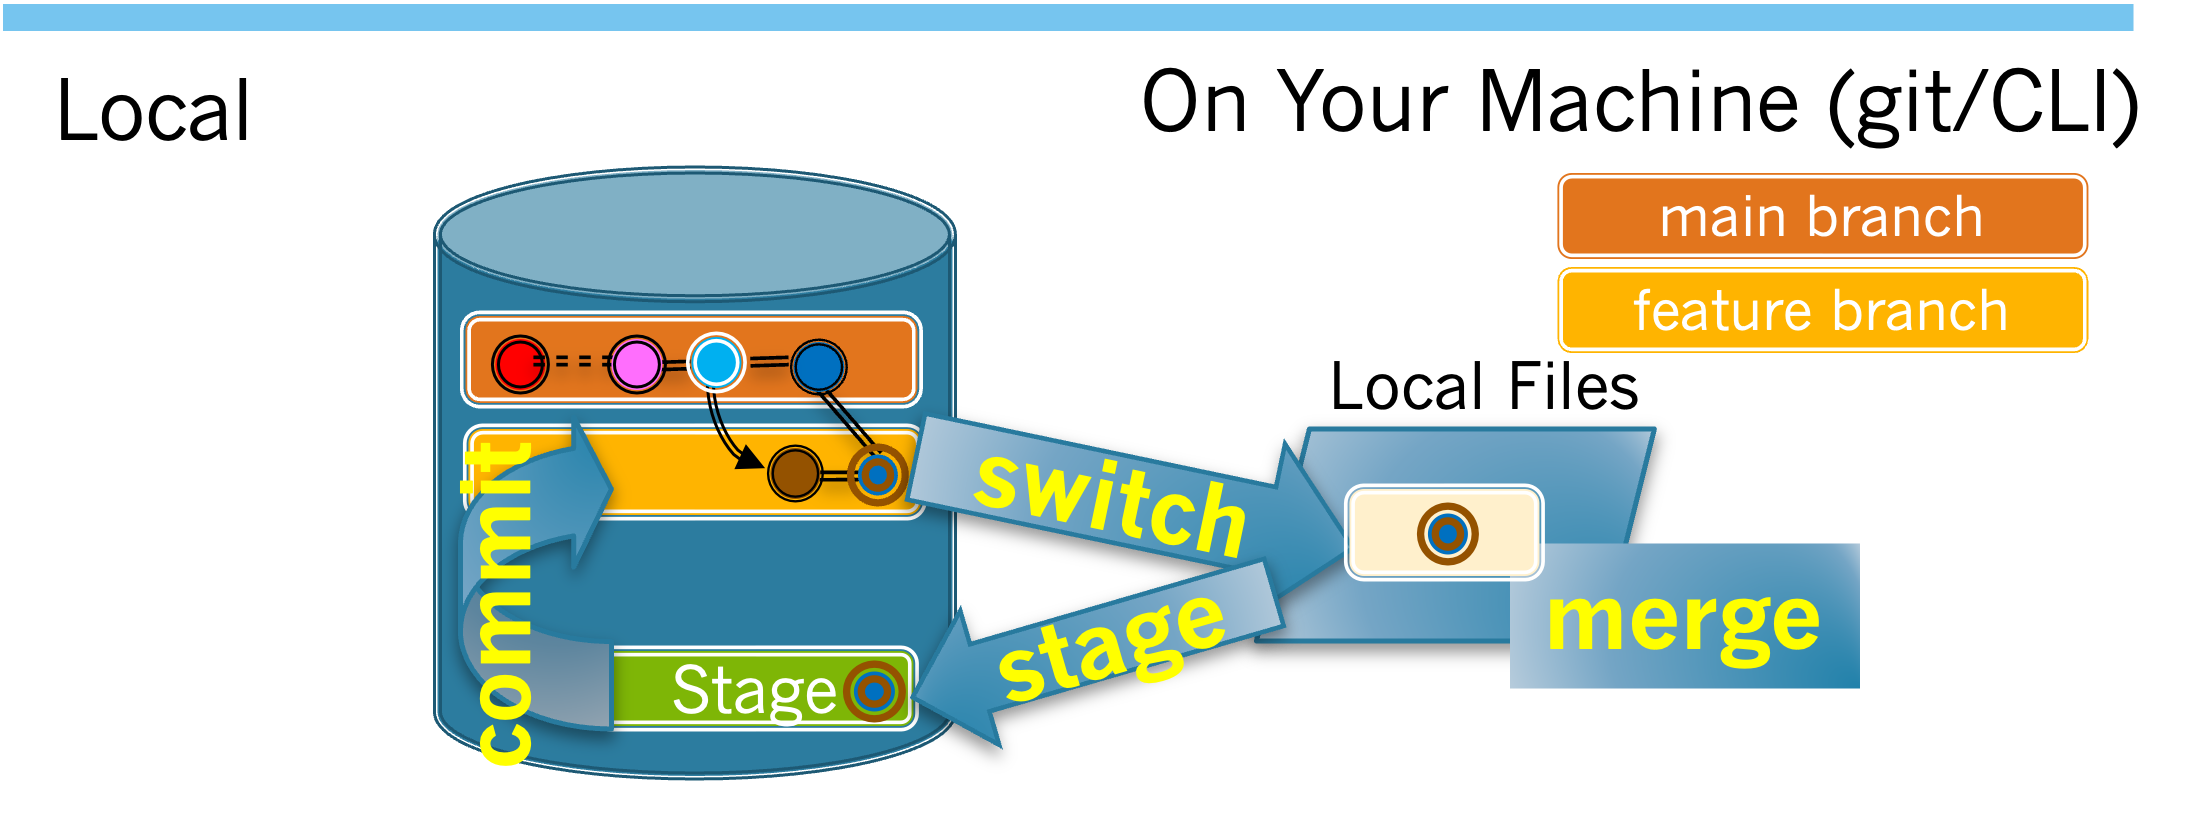
This section will walk you through the process of resolving the merge conflict using a graphical merge tool. The flow of this process is illustrated in Figure 3. You will switch to your feature branch, perform the merge, use the graphical merge tool to resolve the resulting conflict, and then stage and commit the merged content.
Exercises
1.
Ensure that you are on your feature branch. Then issue the command to merge the main branch into your feature branch (like you did in Exercise 5.3.2). The merge should once again fail because of the conflict. Use the cat command to confirm that the raw merge conflict information now appears in the conflicted file again.
As you have seen when a merge fails git places the raw merge conflict information into the conflicted files. You could simply edit that file to resolve the merge conflict. However, in practice it is usually easier to use a mergetool.
Opening the MergeTool:
The KitClient you are using has been configured so that the git mergetool command will launch the the VSCode graphical merge tool, which you can use to resolve the conflict.
2.
The git mergetool command will launch the VSCode merge tool so that you can use it to resolve the conflict.
(a)
Issue the git mergetool command.
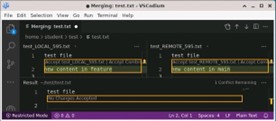
When VS Code’s Merge Editor is first opened, it will open a window containing three panes (LOCAL, REMOTE and Result). The content that you see will be different, but the window that you see should be similar to the one shown in Figure 5.4.2.
Figure5.4.2.Merge Editor Window (example)
(b)
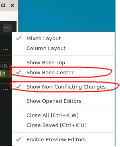
Changing a few of the default settings will make the use of the merge tool easier to understand by displaying the Best Common Ancestor and both non-conflicting and conflicting changes.
Use the "…" menu in the upper right of the merge tool window and check the "" and "" options as shown in Figure 5.4.3.
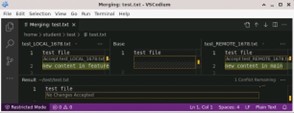
With these options enabled, the merge tool window should now contain 4 panes (LOCAL, Base, REMOTE and Result) and look similar to the one shown in Figure 5.4.4.
Figure5.4.4.Merge Editor Window (example) with new settings
(c)
Do you have your merge tool window showing four panes and their content?
True.
Do not make changes until you have your merge tool set up.
False.
Do not make changes until you have your merge tool set up.
(d)
Using your answer to Task 5.4.2.c, compare the Result pane to the Best Common Ancestor. How are they different? Why?
3.
When using the merge tool, you resolve conflicts by modifying the Result pane so that it appears as desired. You can use the point-and-click "Accept ..." and "Remove ..." options provided by the merge tool to move content into or out of the Result pane or you can edit the Result pane directly.
Use the merge tool to resolve the conflict so that the Result contains:
your changes where there is a conflict.
all of the non-conflicting changes from the main branch.
Copy your final merged result here.
4.
Save your changes in the merge tool and close the merge tool window.
Then issue a git status command.
(a)
Copy the text for your command and its output. Be sure that your output shows the names of any files containing changes that need to be committed.
(b)
Briefly explain why the output you see in Task 5.4.4.a makes sense based on what you have done.
5.
From Exercise 5.4.4 you can see that you now have uncommitted changes. Those changes are all of the changes you made to the Result panel when performing the merge in the merge tool.
Commit the changes you made in resolving the conflict. Be sure to use a meaningful commit message.