You have made the changes necessary to address the issue you were assigned, and you are now ready to upstream those changes. In order to do that, the first step is to get the changes you have made into GitHub so that the upstream maintainers can be told about them.
Exercises
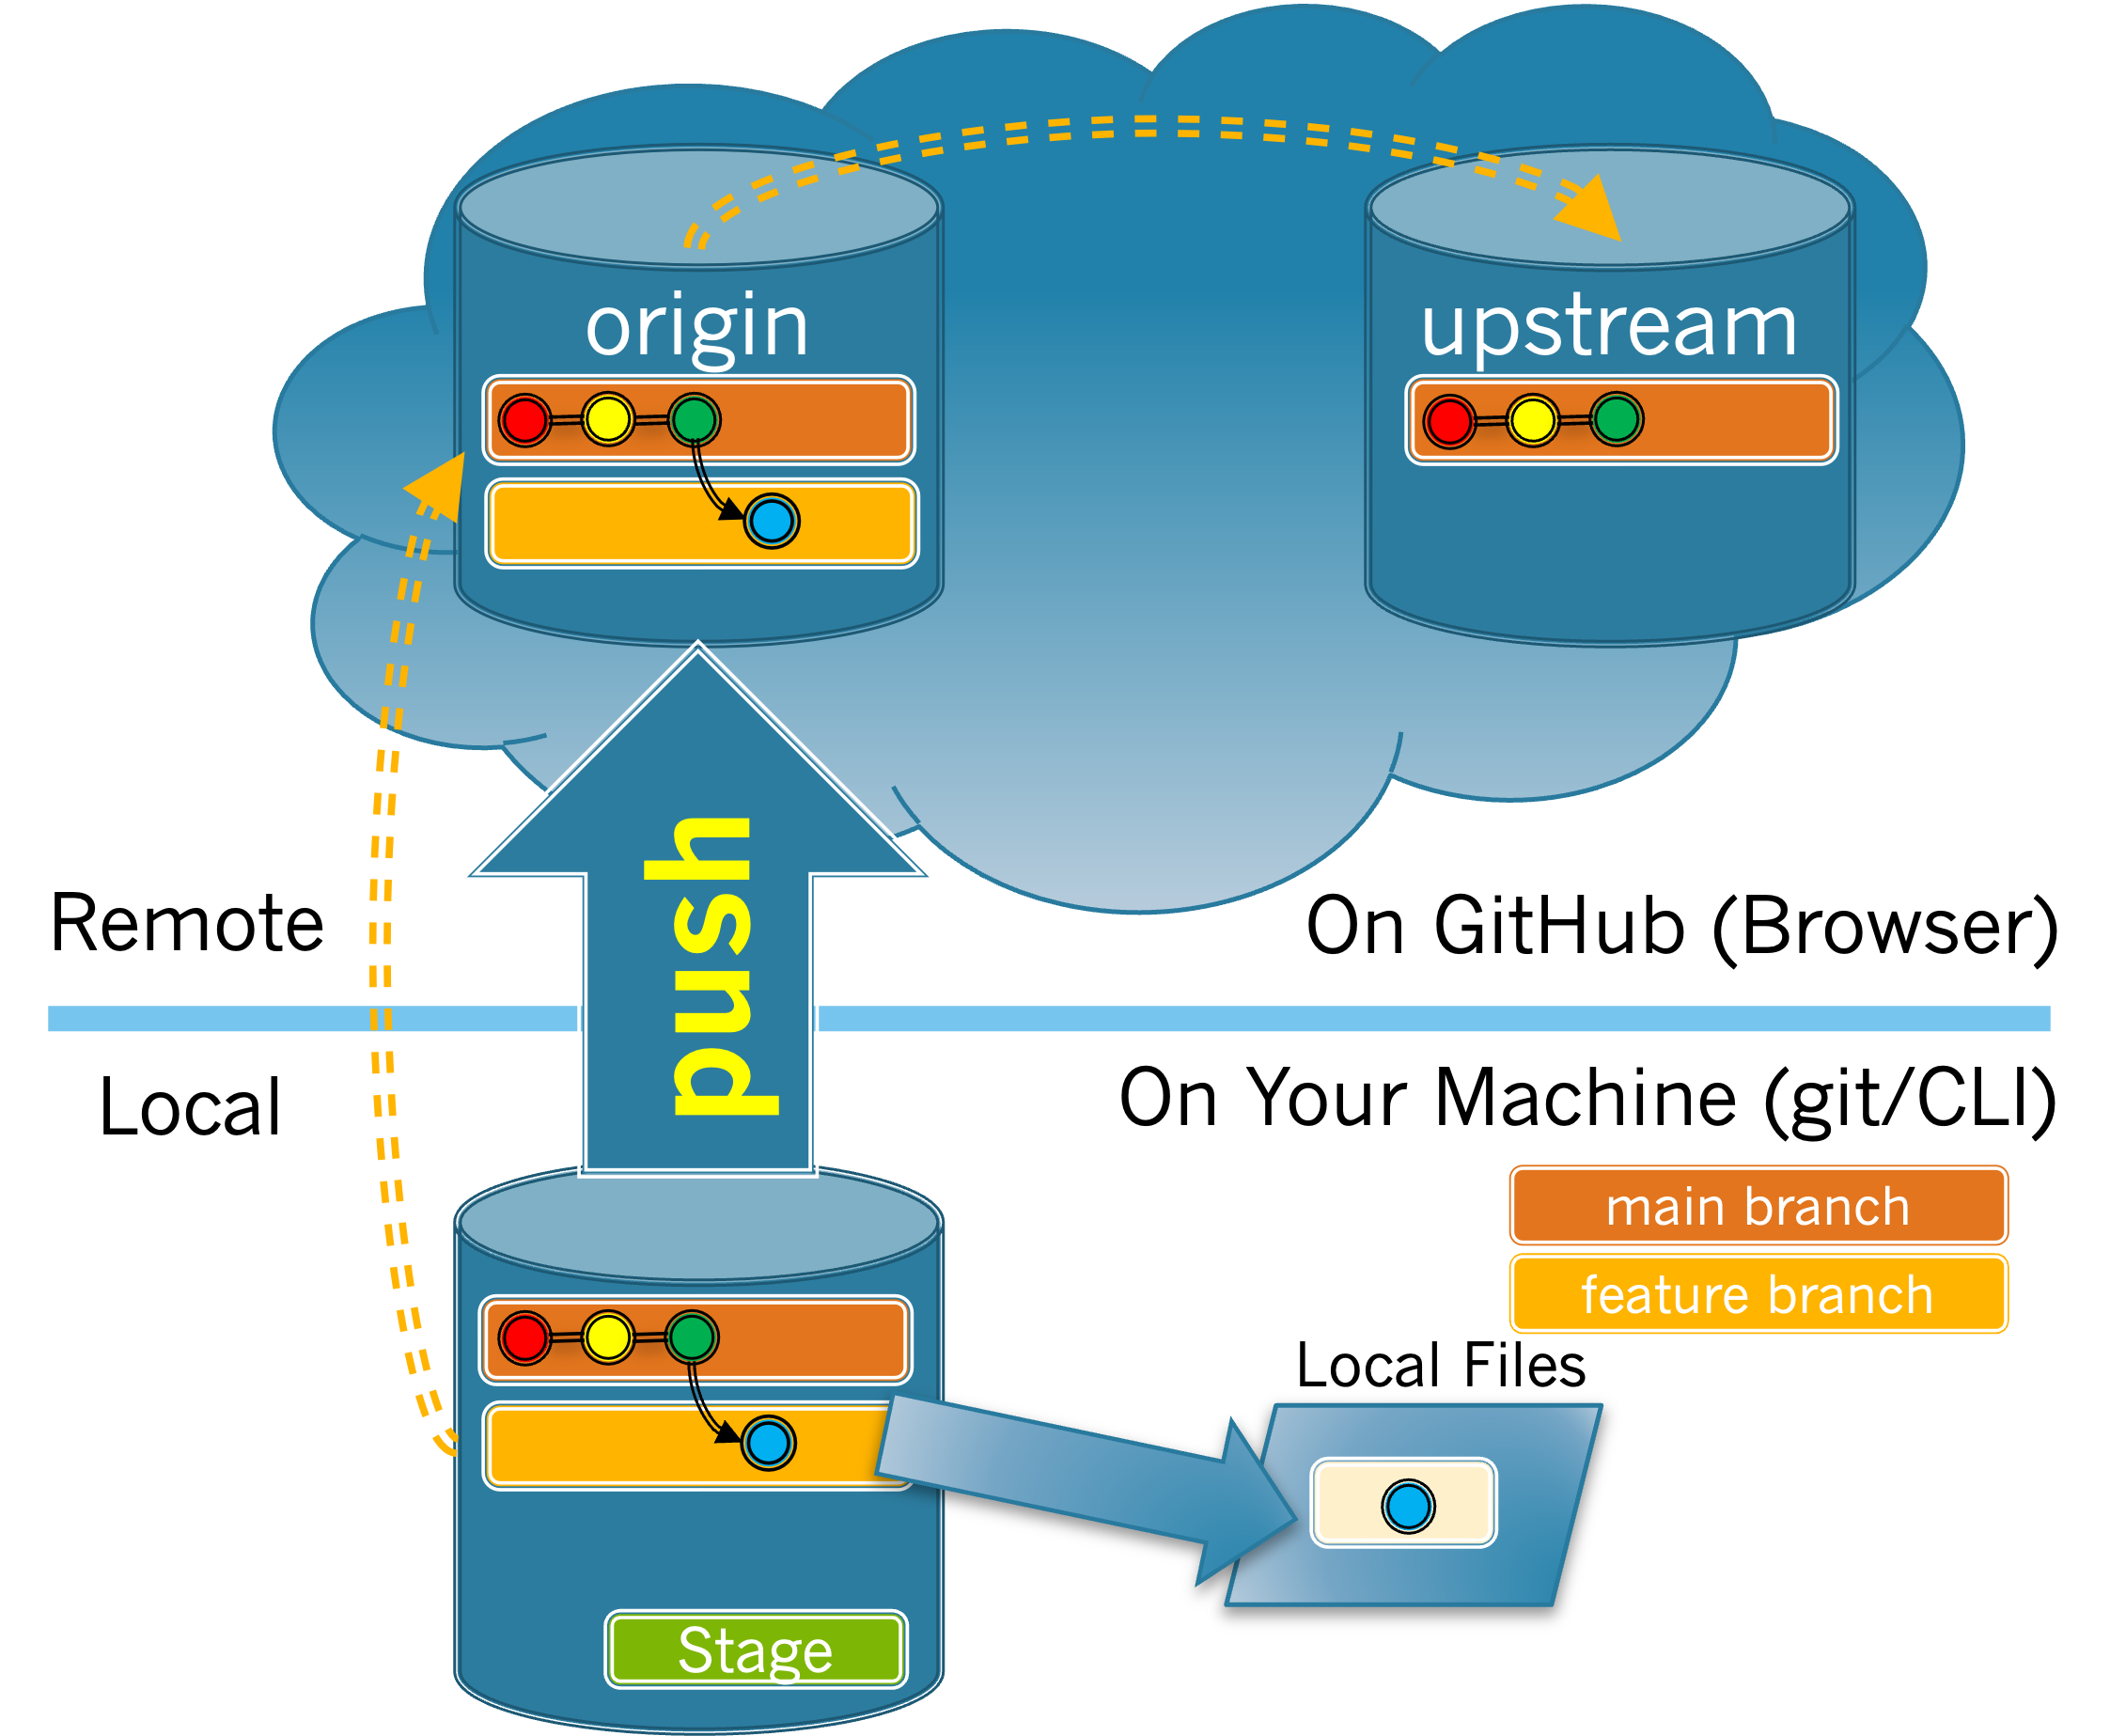
As shown in Figure 3.7.1, this is done by pushing your feature branch to your origin repository. More generally, pushing a branch, copies it from a local repository to a remote repository.
Figure3.7.1.Push Feature Branch to Origin.
1.
The git branch -l (lower case L, not one) command lists all of the branches that exist in your local repository.
How many branches are in your local repository?
1 - main
Look again, you should see more than just the main branch.
1 - feature branch
Look again, you should see more than just the feature branch.
2 - main and feature branch
Correct! Your local repository will have both the main branch and your feature branch.
3 or more with differing branch names
If you have more than 2 branches perhaps you created a feature branch multiple times by accident.
Hint.
Refer to Figure 3.7.1 and look at the local branches on your machine.
2.
Use your browser to look at your origin repository on GitHub.
(a)
How many branches appear in your origin repository on GitHub?
1 - main
Correct! There is only 1 branch, main in your origin repository on GitHub.
1 - feature branch
Look again, your feature branch should not be listed in GitHub as it is only in your local repository.
2 - main and feature branch
Look again, your feature branch should not be listed in GitHub as it is only in your local repository.
3 or more with differing branch names
Perhaps you aren’t in your origin repository. Make sure you see your GitHub userid in the upper left hand corner of your GitHub tab.
Hint.
Make sure you are in your origin repository, not the upstream repository. Refer to Figure 3.7.1 and look at the origin to see what branches should appear on GitHub.
(b)
Why is there a difference between the branches in your origin repository and your local repository?
Getting a Personal Access Token:
Before you will be able to push your feature branch to GitHub you will have to get a Personal Access Token (PAT) from GitHub. A PAT is like a password but has some security benefits. In particular, you can have multiple different PATs. Each one can have different limits on what can be done with it and each one can be revoked individually without affecting the others.
When interacting with GitHub using the git CLI (e.g. when pushing a branch), GitHub requires that you use a PAT for authentication instead of your password.
Be sure to copy and paste your PAT somewhere safe – maybe e-mail it to yourself. You will not be able to retrieve it again after you leave the page.
Note: Typing or even copy and pasting your PAT every time it is needed can be a hassle. To help, the git CLI provides what is known as the credential helper. The git CLI in the KitClient has configured the credential helper so that your PAT will be stored when you enter it the first time. It will then be used automatically for future commands. If you are curious, you can learn more about the credential helper here: Storing Git Credentials with Git Credential Helper 2
The git push <remote repository name> <branch> command will push the specified branch of your local repository to the specified remote repository (i.e. on GitHub).
Use a command that will push your feature branch from your local repository to your origin repository on GitHub.
Note: You can use the name of the remote repository, so you do not need to use the full URL. You will also need to paste your PAT as the password when it is requested. The cursor will not move when you put in the PAT nor will you see any characters. After you type or paste it hit Enter
5.
The output from Exercise 3.7.4 should not contain any error messages. The last few lines should also give you some indication that that your push was successful. Visit your origin repository on GitHub and check that the branch was pushed.