You now have been assigned an issue to work on and yuu have created a fork of the upstream GitKit FarmData2 repository into your GitHub space.
To work on your issue you will need to setup your development environment. Your development environment is where you will create your clone of the repository, where you will edit files, and where you will use `git` commands to add your changes to to your clone and push those changes to your origin.
Many FOSS contributors will setup the development environment on their personal machines. Because student machines vary greatly the GitKit provides a browser based development environment, called a KitClient. This development environment runs in the cloud and you will access it using your web browser. This development environment includes standard development tools but also has a few features designed specifically to help you stay on track when completing the GitKit’s hands-on exercises.
Subsection2.7.1Starting the Development Environment
In this section you will learn how to start, configure, stop, and restart your development environment.
Exercises
1.
Your development environment will run in the cloud using a service called GitPod. Visit gitpod.io/login and login using the “Continue with GitHub” button and providing your GitHub username and password.
2.
The following tasks will guide you through the process of starting and configuring your development environment.
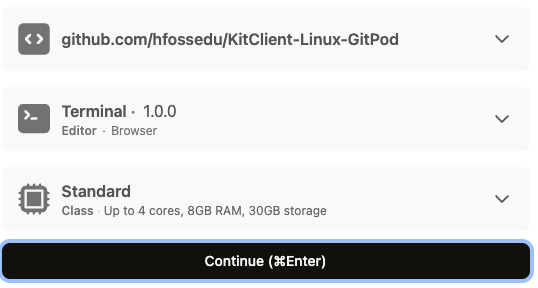
Paste the URL of your GitKit FarmData2 repository from Exercise 2.6.3 into the text box and press "Enter".
(c)
Choose "VS Code..." as the "Editor - Browser" and "Standard" as the machine "Class" as shown here:
(d)
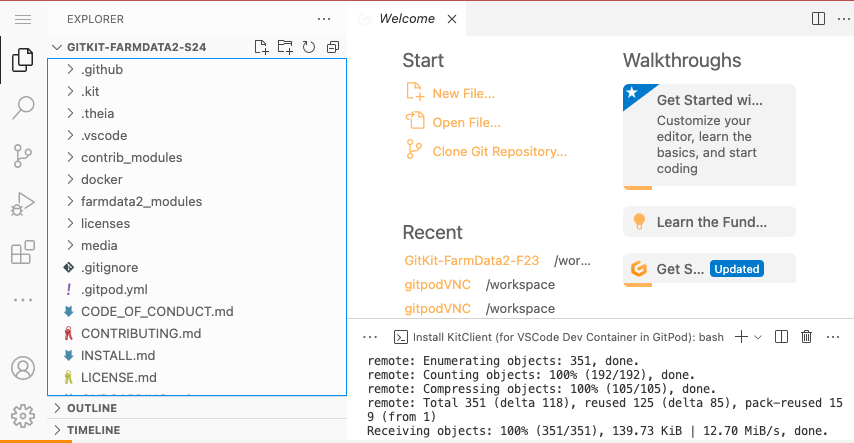
Click the "Continue" button and wait for the development environment to open in the browser. It will appear similar to the window shown in Figure 2.7.1.
Figure2.7.1.The development environment.
(e)
A message box may appear in the lower right corner of the development environment asking if you would like to reopen the project in "VS Code Desktop". If this happens you can click the "X" to close the box, or ignore it and it will go away on its own.
3.
In the "TERMINAL" tab at the bottom of the window you should see "😺💻 Meow, Kit-tty here!" in the output. Read the associated text. What is the Kit-tty?
Hint.
Subsection2.7.2Configuring the Git Client
Your development environment includes a Git client. The Git client is the tool that you will use to interact with Git repositories, such as the GitKit FarmData2 repository.
There are lots of different Git clients. Some are graphical and some use a text interface. These exercises, introduce you to Git using its text-based command line interface (CLI). This is the most general way to interact with Git and will provide a conceptual foundation for using any other Git client that you might encounter.
Exercises
1.
You will interact with Git using its command line interface via a Terminal. Use the following steps access the Terminal.
Click on the "TERMINAL" tab near the bottom of the development environment window to make the Terminal active.
2.
git
(a)
Enter the command git into the Terminal.
(b)
Give a git command that will cause ,git to display its version.
Hint.
Use the output from Task 2.7.2.2.a to determine what flag to pass to git.
(c)
What version of the git command line client is installed in your development environment?
Hint.
Use the command that you identified in Task 2.7.2.2.b to determine the git version.
3.
Recall from class that Git repositories maintain a complete history of all changes, including who made each change. To do this, Git needs to know a little bit of information about you.
Git identifies the author of each change using two pieces of information: A name and an e-mail. For name, you might decide to your full name, or a nickname, or your GitHub username. Just keep in mind that whatever name you use will be associated with all of the changes you make. For e-mail, you can again use any valid e-mail associated with you.
The tasks in this exercise will guide you through the process of configuring the Git client in your development environment.
(a)
Use the following command to set the name that Git will associate with your changes:
git config --global user.name "<name>"
Replace "<name>" with the name you wish to use and be sure not to include the < and >.
(b)
Use the following command to set the e-mail that Git will associate with your changes:
git config --global user.email "<e-mail>"
Replace "<e-mail>" with the name you wish to use and be sure not to include the < and >.
(c)
Use the following command to display Git’s global configuration including the two new settings you just added:
git config --global --list
Give the output of this command as your answer for this task.
Subsection2.7.3Adjusting some GitPod Settings
There are a few GitPod settings that you can change that will make working with your development environment more convenient.
Exercises
1.
Use the following steps to adjust your GitPod settings.
Choose "Rename" from the "⋮" (three vertical dots) menu to the right of the KitClient workspace and rename the workspace to be "GitKit Dev Env" or something else that you will remember easily.
(c)
Click the "Pushpin" icon, or choose "Pin" from the "⋮" (three vertical dots) menu to the right of the "GitKit Dev Env" workspace.
This will Pin your GitKit workspace making it easier to find, and will also prevent it from becoming inactive or being deleted if you don’t use it for a few days.
Set your “Timeout” to 10 minutes. This will stop your development environment if you are away from it for more than 5 minutes. This will help to ensure that your free GitPod credits are not accidentally used up if you forget to stop your development environment.
If your development environment times out and stops you can restart it using the steps in Subsection 2.7.5.
Subsection2.7.4Stopping your Development Environment
At some point you will complete this assignment or want to take a break and do other things. When you do so, you should stop your development environment.
Exercises
1.
You can stop your development environment using the following steps.