Quantum computing operations harness quantum properties to have outputs that are not possible with classical computers. For this reason, we represent quantum programs and quantum state differently than in classical computing.
In this part of the lesson, we will learn some basic quantum operations that can be implented by classical computers and introduce a drag-and-drop tool (Q.js) you can use to build build quantum circuits. In future lessons, you will use this tool to explore the behavior of quantum operations that cause properties not possible with classical computers.
Grace Hopper invented the compiler, which allowed programmers to often ignore the 1’s and 0’s in the machine and use higher level languages. Unfortunately, the unique features of quantum computing reveal themselves on single bits, and algorithms are still designed at the bit level. Therefore, we will operate on single bits, not integers or larger numbers.
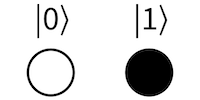
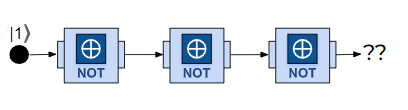
A quantum bit, or qubit, holds a 0 or 1, just like a classical bit. However, a single qubit also holds other interesting information that we will explore throughout this course. Today, we will only use the 0 and 1. To go along with the more complex state, the representation uses slightly different syntax. We will begin that now - instead of just writing 0 or 1, we will write |0⟩ and |1⟩. Later, we will learn more about what those symbols mean.
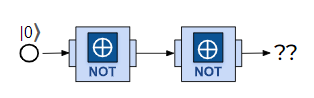
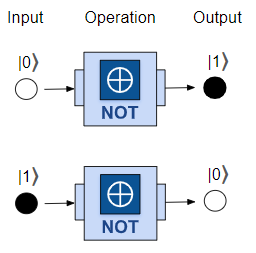
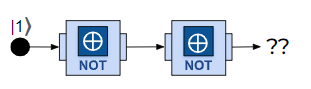
Quantum operations are called gates. The simplest operation is the NOT, or X, gate. From a classical perspective, it toggles the value between 0 and 1. That is, if the input is 0, the output is 1, and vice versa.
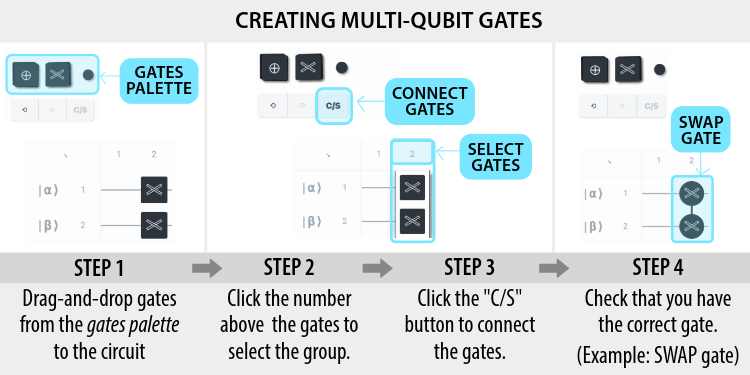
Below is your first circuit to build using the circuit builder’s explore mode. Drag and drop the pictures of the gates onto the circuit. In explore mode, every time you make a change, it provides feedback. You can ignore the feedback until you think you are done!!
The SWAP gate is a two-qubit gate. Create the SWAP gate by dragging , which will be two diamonds in this widget. Place the two diamonds on the two wires in the same column. Click on them so they are both highlighted, then click on the "S" button to connect them.
Now let’s try building a circuit with a controlled gate - just like the controlled increment we saw in the math example. Put a spot on one the control wire and the gate on the target wire. Click on them to make sure they are both highlighted, then click the "C" button to connect them.